VFX Graph Export
Bake a Unity VFX Graph (VisualEffect) asset — a GPU-driven magic burst, beam, explosion, or energy effect — into a frame sequence and sprite sheet. Snap steps the effect deterministically with VisualEffect.Simulate() (the same primitive Unity's own VFX preview uses), so it works for any VFX asset with no special exposed-property setup.
This lives on the VFX Graph tab, the sibling of Particle FX Baking among Snap's Expert FX tabs.
Requires the Visual Effect Graph package
This tab only does anything when Unity's Visual Effect Graph package (com.unity.visualeffectgraph) is installed in your project. Snap compiles and runs fine without it — the whole VFX feature is guarded behind a SNAP_SUPPORTS_VFX define that's set only when the package is present.
If the package is absent, the VFX Graph tab is still there but shows just an install nudge:
VFX Graph export needs the Visual Effect Graph package. Install
com.unity.visualeffectgraphfrom Package Manager (URP or HDRP) and this tab activates automatically.
Install it from Window → Package Manager, and the tab lights up on the next recompile — no extra Snap setup. VFX Graph itself requires URP or HDRP (it doesn't run on the Built-in pipeline).
Prerequisites
A prefab containing a VisualEffect component (a VFX Graph asset), and the Visual Effect Graph package installed (see the note above). Capturing a built-in Shuriken particle system instead? That's the sibling tab — Particle FX Baking.
What bakes well
Baking flattens a 3D GPU effect into framed sprites, so the same suitability guidance as Particle FX (see the "What bakes well — and what doesn't" note there) applies: bursts, impacts, projectiles, and target-anchored effects bake well; ambient volumetric loops (drifting fog, screen-wide fields) don't — there's no contained subject to frame.
Some VFX Graph effects won't convert at all
Beyond "bakes poorly," some effects are simply incompatible with 2D flattening — and VFX Graph, being GPU-driven, hits this more often than Shuriken. Anything that leans on the live pipeline has nothing to bake into a sprite: refraction / distortion / heat-haze, depth-fading soft particles, screen- or camera-space effects, world-space or collision-driven behaviour, and looks that need scene lighting, shadows, or reflections. GPU artists build for a live engine, so plenty of graphs use techniques with no 2D equivalent. Rule of thumb: if it doesn't read as a flat sprite in the preview, it won't export as one — that's the nature of 3D→2D, not a Snap limitation. Use the effects that read cleanly, or make a 2D-friendly variant.
1. Open the VFX Graph tab
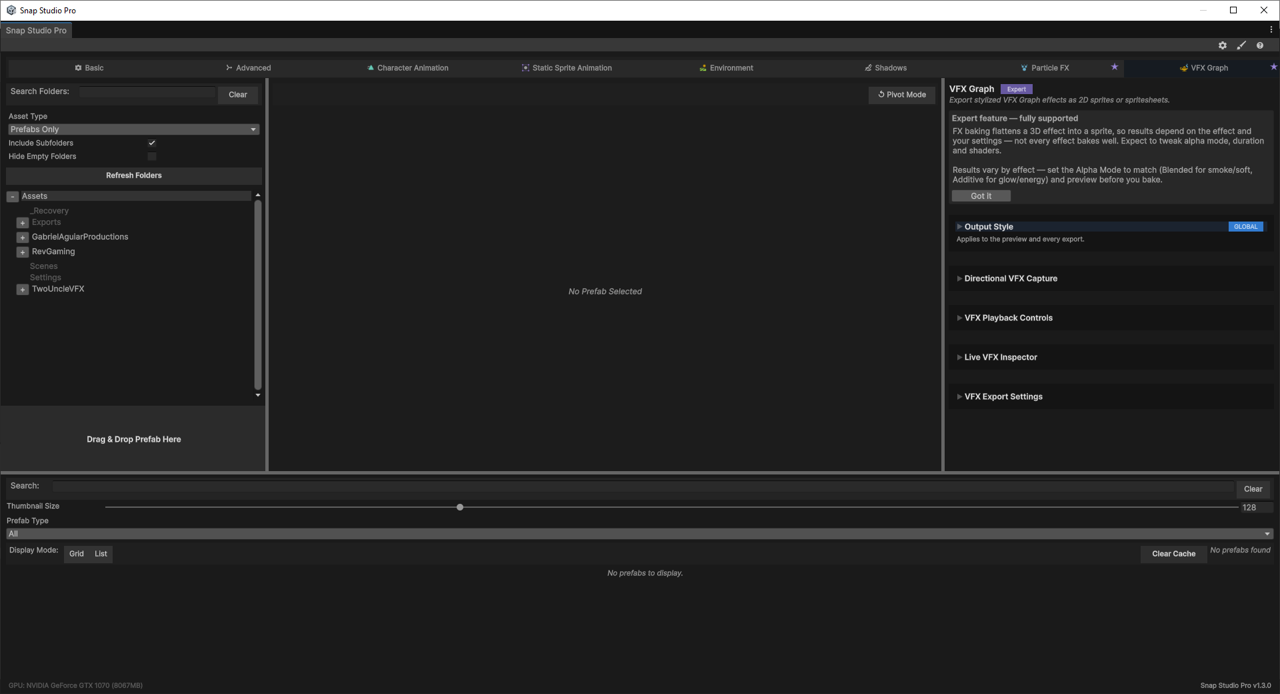
Open Snap Studio Pro (Tools → Rev Gaming → Snap Studio Pro) and switch to the VFX Graph tab. With the package installed, you'll see the playback, parameter, directional, and export sections.
2. Load a VFX prefab
Drag a prefab containing a VisualEffect into Snap. VFX-only prefabs (no mesh to thumbnail) show a clickable VFX placeholder tile in the grid; a prefab that also has geometry gets a real thumbnail.
On selection, Snap primes the preview to a representative frame so the effect is visible immediately rather than an empty t=0.
3. Preview and scrub the effect
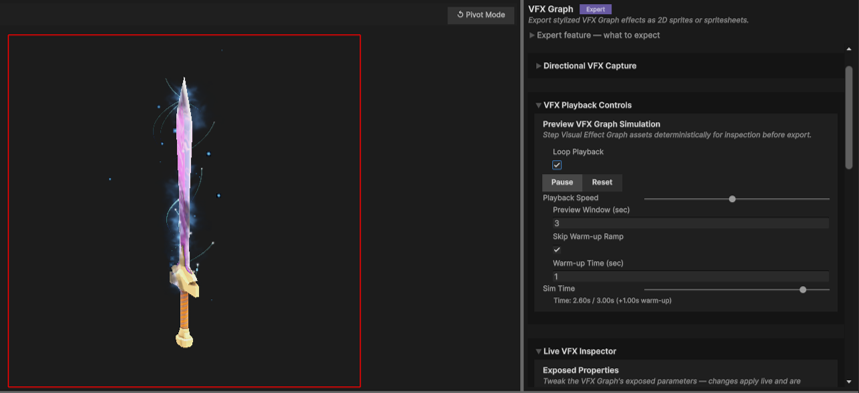
Open VFX Playback Controls:
- Play / Pause — step the effect forward in the preview.
- Reset — return to the start.
- Loop Playback — repeat the preview at the end.
- Playback Speed — a
0.1×–2×multiplier to slow a fast effect down. Preview-only — it doesn't change export timing. - Preview Window (sec) — how far the Sim Time slider can scrub. Widen it to hunt for two frames far apart that match closely enough to cut a seamless 2D loop. Preview-only — the export duration is set separately (step 5).
- Sim Time — scrub to any moment within the preview window.
Skip Warm-up Ramp — line the preview up with the export
Many effects ramp up before they read well. Turn on Skip Warm-up Ramp and set its Warm-up Time (sec) so Sim Time 0 shows the effect's steady state instead of a cold t=0. Set this to the same value as the export's Warm-up Time (step 6) and the frames you scrub here are exactly the ones the export produces — which makes hunting for loop points reliable.
4. Tune parameters live (optional)
VFX Graph assets expose their own parameters. The VFX parameter inspector embeds Unity's own VisualEffect inspector directly in the panel, so every exposed property — of any type — is editable in place with zero per-prefab setup. Tweak the effect, then preview and export the result.
5. Set duration and FPS
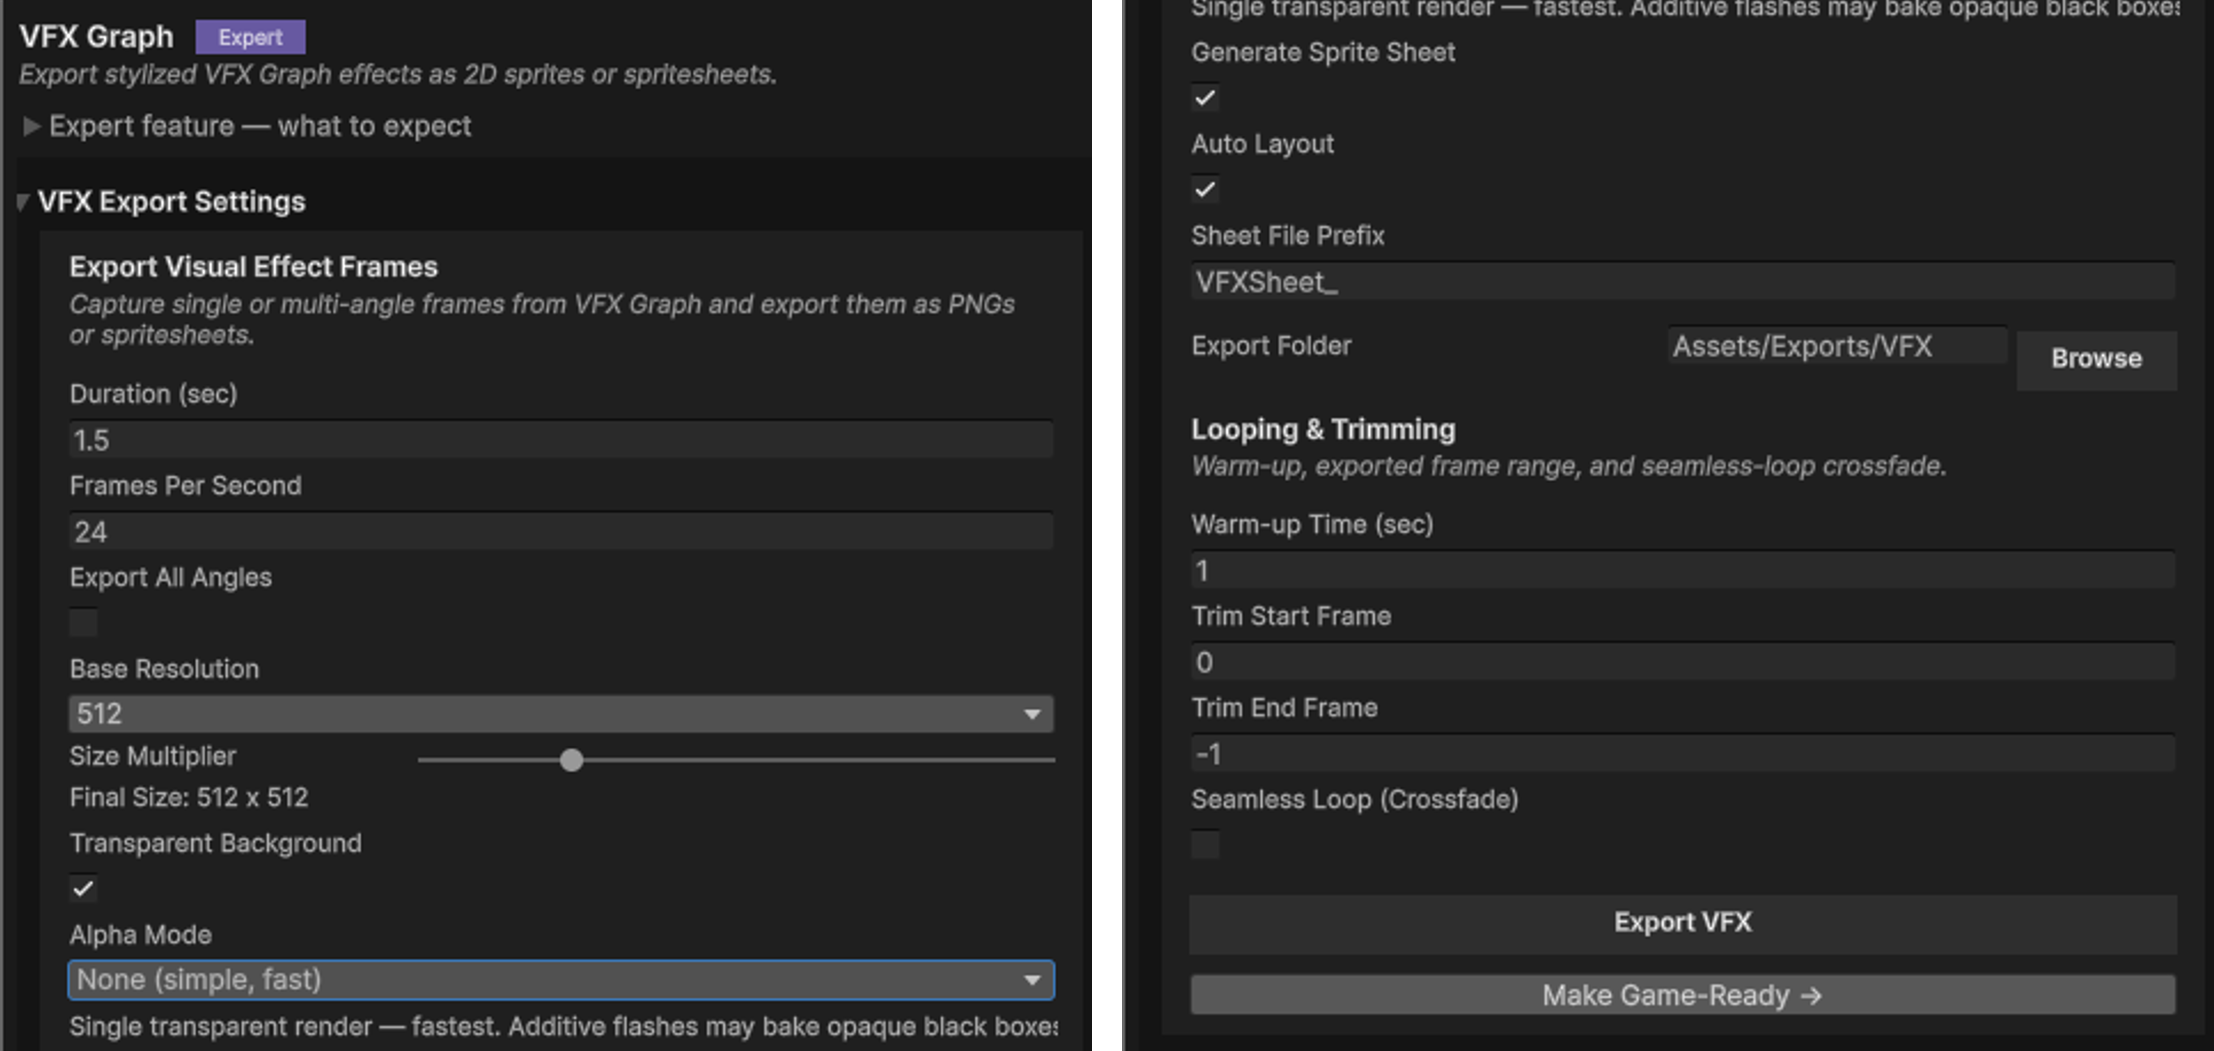
Open VFX Export Settings and set Duration (sec) and Frames Per Second — the exported clip length and frame rate.
VFX duration isn't auto-scoped
Unlike the Particle FX tab, VFX Graph exposes no lifetime for Snap to read, so Duration and FPS don't auto-fill from the effect — set them yourself. Use the preview's Sim Time readout to gauge how long the effect needs.
6. Warm-up, trimming, and looping
Under Looping & Trimming:
| Control | What it does |
|---|---|
| Warm-up Time (sec) | Advances the effect this long before frame 0 so it captures at its steady state. Mirror this to the preview's Skip Warm-up value to line them up. |
| Trim Start Frame | First exported frame (0-based). |
| Trim End Frame | Last exported frame; -1 = through the end. |
Looping controls
Two ways to loop a continuous effect that never returns to its start state.
Auto-Detect Loop Point (recommended). Tick it and Snap scores every possible cut, trims to the closest-matching frame pair, and hides the small residual with a short crossfade — reporting how clean the loop is. If no good loop exists it falls back to the manual crossfade rather than forcing a bad cut.
Want to review the cut first? Click Find Best Loop — it runs the same quick scan and just sets the Trim Start/End range (with the seam quality) without exporting, so you can check or adjust it before you bake.
VFX loops often need a couple of passes
VFX Graph effects tend to be less periodic than particle bursts — and aren't perfectly repeatable run to run — so auto-loop may not land a clean cut first try (particle bakes, by contrast, are deterministic and usually nail it). Re-run Find Best Loop to surface a different, sometimes cleaner cut; widen Duration / Warm-up Time to give it more frames to match; or set the Trim range by hand. The crossfade will still soften a rough seam.
Seamless Loop (Crossfade) (manual). Cross-dissolves the tail of the capture back into the head so the sprite loops with no visible seam. The trade-off is honest: it softens motion near the seam and shortens the exported sequence by the overlap.
- Crossfade Overlap — how much of the clip to dissolve, as a fraction (
5%–50%). More overlap hides the seam better but softens more motion and removes more frames; the panel shows the exact percentage of captured frames it will consume.
Ping-Pong Loop (bounce it). Plays the clip forward then backward on repeat — no cut, so it's always seamless on any effect, but the motion reverses on the return. Suits non-directional effects (shimmer, pulse, energy fields), not directional flow like a beam sweep or a projectile. It's the guaranteed fallback for effects that won't cut cleanly — which, given VFX's less-periodic nature, is a handy one to have on this tab.
7. Alpha Mode, size, and format
- Transparent Background — on for sprites. Alpha Mode only applies when this is on.
- Alpha Mode — how transparency is recovered. There's no Auto here on purpose: VFX Graph output blending isn't introspectable the way particle materials are, so you pick the mode to match the effect:
| Alpha Mode | Use for | Cost |
|---|---|---|
| None (simple, fast) | Opaque effects. Additive flashes may bake opaque black boxes into the sprite. | Fastest |
| Blended (smoke / soft FX) (default) | Smoke, soft edges — renders over black + white to recover clean alpha, but flattens additive glow. | ~2× render time |
| Additive (glow / energy FX) | Magic, beams, energy — renders over black and uses brightness as alpha, keeping glow punchy with no black boxes. | ~2× render time |
- Export size — a base resolution with a size multiplier; the resolved dimensions are shown.
- Generate Sprite Sheet (on by default) — assemble the frames into one sheet, with Auto Layout / Frames Per Row and a Sheet File Prefix (default
VFXSheet_).
Match the Alpha Mode to the effect, then preview
The tab's intro says it plainly: results vary by effect — set the Alpha Mode to match and preview before you bake. Blended for smoke and soft edges, Additive for glow and energy, None for opaque. If a glow effect bakes with a dark box behind it, switch it to Additive.
8. Choose a destination and export
- Export Folder — type a path or Browse. VFX uses its own export path, separate from the Particle FX folder.
Keep the export folder inside Assets/
Unity only imports assets under Assets/. A folder outside it won't produce usable Sprites.
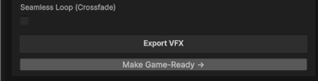
Click Export VFX. Frames are written as {prefab}_Frame_###.png (the capital Frame_ feeds Game-Ready Output); multi-angle exports write Angle_###/ subfolders. Make Game-Ready sits below the button for a one-step hand-off to clips and a prefab.
Multiple angles
Tick Export All Angles, then set the angle preset in the Directional VFX Capture panel above (it has its own Preset, Camera Distance, pitch, and a Recenter Pivot to VFX Bounds button). For the full workflow, see Directional Capture.
Troubleshooting
The VFX Graph tab shows only an install message
The Visual Effect Graph package isn't installed. Add com.unity.visualeffectgraph from Window → Package Manager (it needs URP or HDRP); the tab activates on the next recompile.
A glow / magic effect bakes with a black box behind it
You're on None or Blended. Switch Alpha Mode to Additive, which uses brightness as alpha and keeps the glow punchy without the box.
The loop still shows a visible seam
Try Auto-Detect Loop Point (step 6) first — it finds the closest-matching cut for you and reports the seam quality. If you're crossfading by hand, increase Crossfade Overlap — more overlap hides the seam better, at the cost of more softened frames — and use the preview's Preview Window + Skip Warm-up Ramp to find two frames that already match closely before you crossfade.
The editor hangs or the GPU crashes during a heavy export
Multi-angle and dual-background alpha renders are intensive; on some GPUs Unity's Direct3D12 backend can time out the device. Put Direct3D11 first in Player Settings → Other Settings → Rendering → Graphics APIs for Windows and restart. Snap shows an in-panel tip when D3D12 is detected.
Next steps
- Want clips and a prefab, not loose frames? Game-Ready Output turns the
Frame_###.pngsequence into an AnimatorController, clips, and a drop-in prefab. - Capturing a built-in particle system instead? Particle FX Baking is the Shuriken sibling of this tab.
- Need a full multi-direction set? Directional Capture covers 4/8/16-direction exports.
- New to Snap? Your First Sprite walks the core load-frame-export loop.