Shadows
A flat sprite with no shadow can look pasted-on. The Shadows tab adds a grounded contact shadow under your capture — and can even export the shadow on its own, so you can drop a matching shadow beneath a sprite at runtime. It's a shadow catcher: an invisible plane under the prefab that receives the shadow and nothing else.
Prerequisites
A prefab loaded in the preview (see Your First Sprite), and the Shadows tab selected. Shadows work alongside your lighting — in fact, the light is what casts the shadow, so the two tabs work together.
1. Set up the shadow catcher
Under Configure the Shadow Catcher:
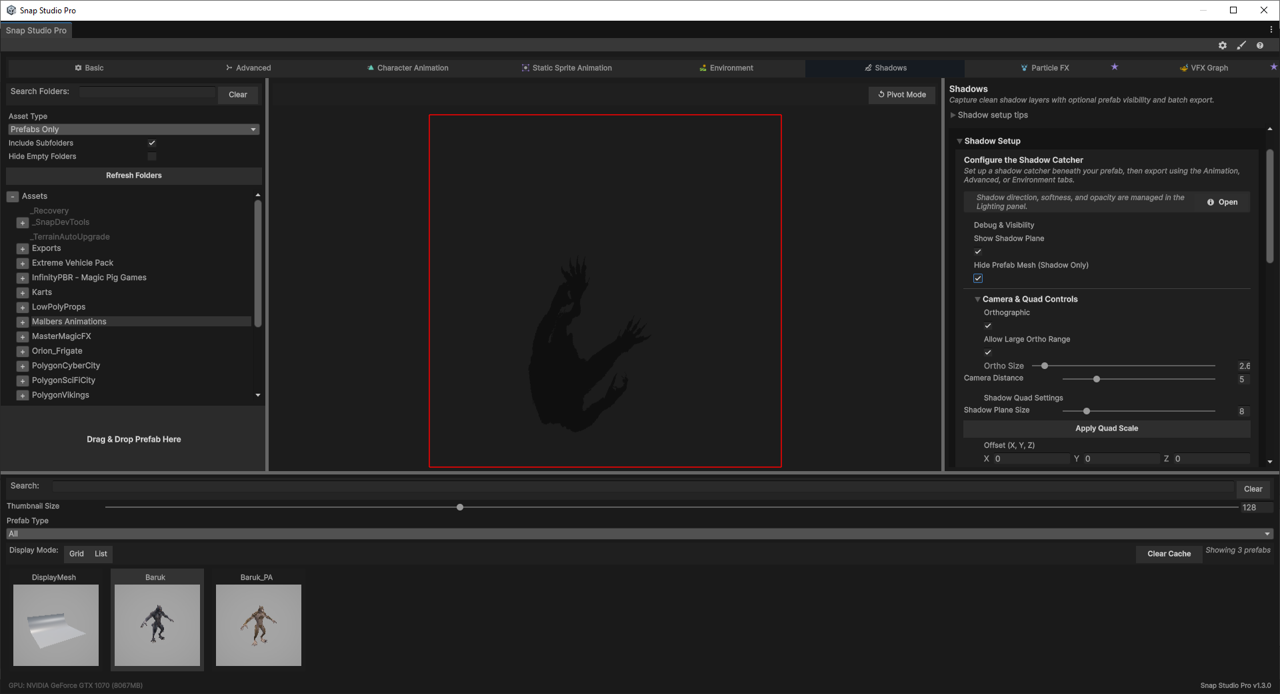
- Show Shadow Plane toggles the catcher on and previews the shadow landing under the prefab.
- Shadow Plane Size scales the catcher so it's large enough to hold the whole shadow without clipping its edges.
Shadow direction, softness, and opacity live in the Lighting panel
The shadow is cast by your key light, so its angle, blur, and strength are controlled where the light is — the Lighting panel. The Shadows tab gives you a Jump to Lighting Panel button so you can hop straight there. Set the look of the shadow with the light; set the catcher here.
2. Position the catcher
Under Camera & Quad Controls:
- Camera Distance moves the preview camera in or out (live).
- Apply Quad Scale / Shadow Quad Settings size and place the catcher quad so the shadow sits correctly under the model.
Nudge these until the shadow reads as contact — anchored to the base of the prefab, not floating or cut off.
3. Choose the ground
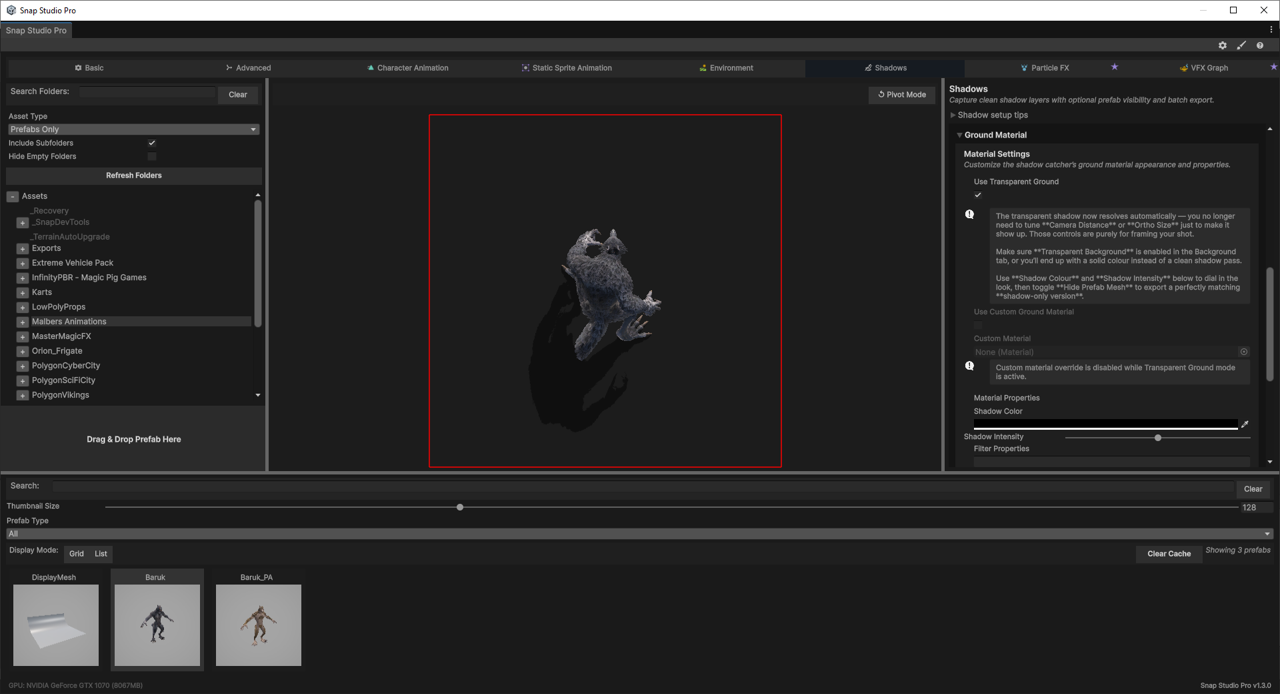
Under Ground Material you decide what the shadow lands on:
- Use Transparent Ground — the ground itself is invisible; only the shadow is captured. This is what you want for a sprite that carries its own shadow onto any background.
- Use Custom Ground Material / Background Material — assign your own material if you want a visible surface (a floor, a tile) under the capture.
Transparent ground is a URP feature
Capturing a shadow on a transparent ground relies on URP's rendering. On the Built-in pipeline and HDRP that option is disabled with an explanatory note — use a solid ground material there instead. See Render Pipeline Notes.
4. Shadow-only export
Tick Hide Prefab Mesh (Shadow Only) to hide the model and capture just the shadow. You get a standalone shadow sprite you can place beneath a character at runtime — handy for keeping one shared shadow across many frames, or decoupling the shadow from the sprite so it can squash and stretch independently.
5. Time of day
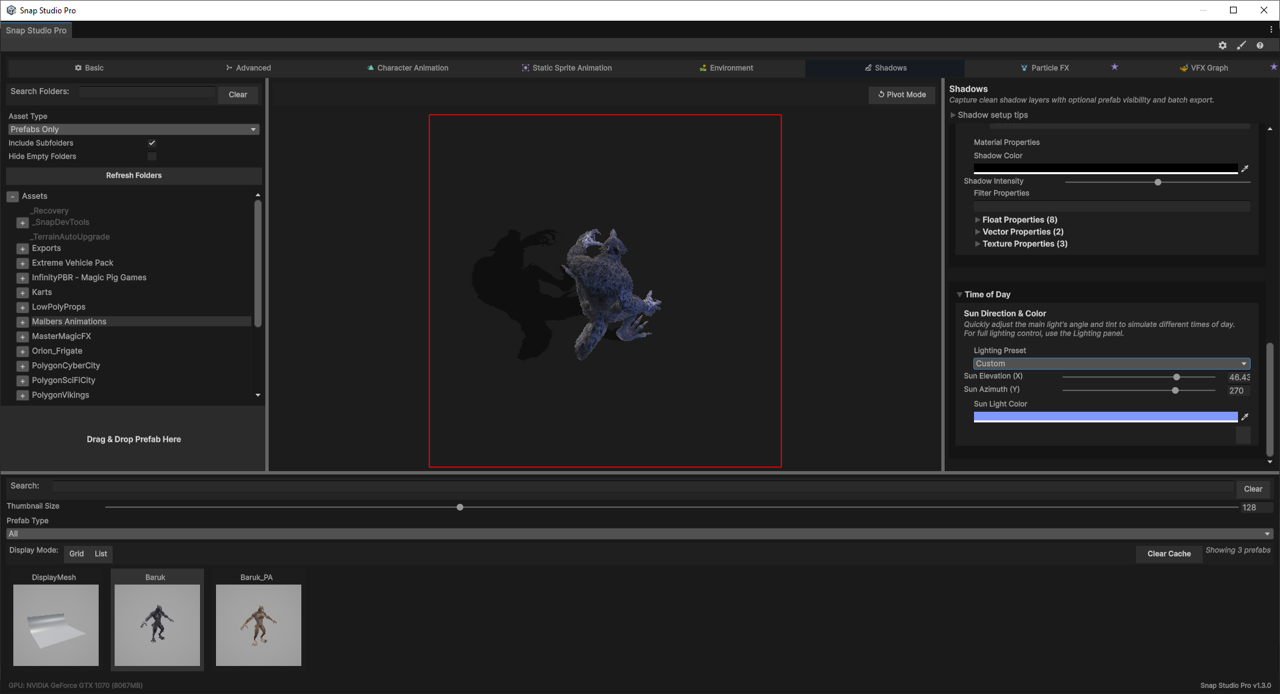
The Time of Day section shifts the sun for a different mood and shadow angle:
- Time of Day Preset applies a ready-made sun setup.
- Sun Elevation (X) and Sun Azimuth (Y) aim the sun manually — lower the elevation for long, dramatic late-day shadows; raise it for short midday ones.
- Time of Day Color warms or cools the light.
Troubleshooting
I don't see a shadow
Make sure Show Shadow Plane is on, and check the Lighting panel — if the key light is disabled or pointing straight down, there's little shadow to catch. Use Jump to Lighting Panel to check.
The shadow is clipped at the edges
Increase Shadow Plane Size (and/or Apply Quad Scale) so the catcher is bigger than the shadow's footprint.
My transparent-ground option is greyed out
You're on Built-in RP or HDRP — transparent-ground shadow capture is URP-only. Use a custom ground material instead, or switch the project to URP.
The shadow is too hard / too soft / wrong direction
Those are light properties, not catcher properties — adjust them in the Lighting panel (Jump to Lighting Panel).
Next steps
- Want the shadow baked into the sprite? Leave the mesh visible and export normally — see Capturing a Single Sprite.
- Want a separate, reusable shadow? Use Shadow Only (step 4) and pair it with your sprite at runtime.
- Tuning the light that casts it? Lighting & Studio Presets.
- Backgrounds and transparency more broadly: Backgrounds & Styling.