Post-Processing
Post-processing is where a capture goes from correct to cinematic — bloom on the engine glow, a graded colour palette, a touch of vignette. Snap gives you three layers of it, and you reach for whichever matches how much control you want:
| Layer | Where | Use it when… |
|---|---|---|
| Studio Presets | Basic tab | You want a finished look in one click. |
| Output Style | Basic tab (GLOBAL) | You want a quick colour/stylise grade over the whole output. |
| Global Volume | Advanced tab | You want the full native post stack — bloom, vignette, tonemapping, colour grading. |
They stack: a Studio Preset is really just a saved combination of the two layers below it. Everything here applies to the preview and every export, so what you see is what you ship.
Prerequisites
A prefab loaded (see Your First Sprite). Post-processing shows best on a colourful, well-lit subject — grades and bloom that are invisible on a dark model pop on something with colour and highlights.
1. Output Style — the quick global grade
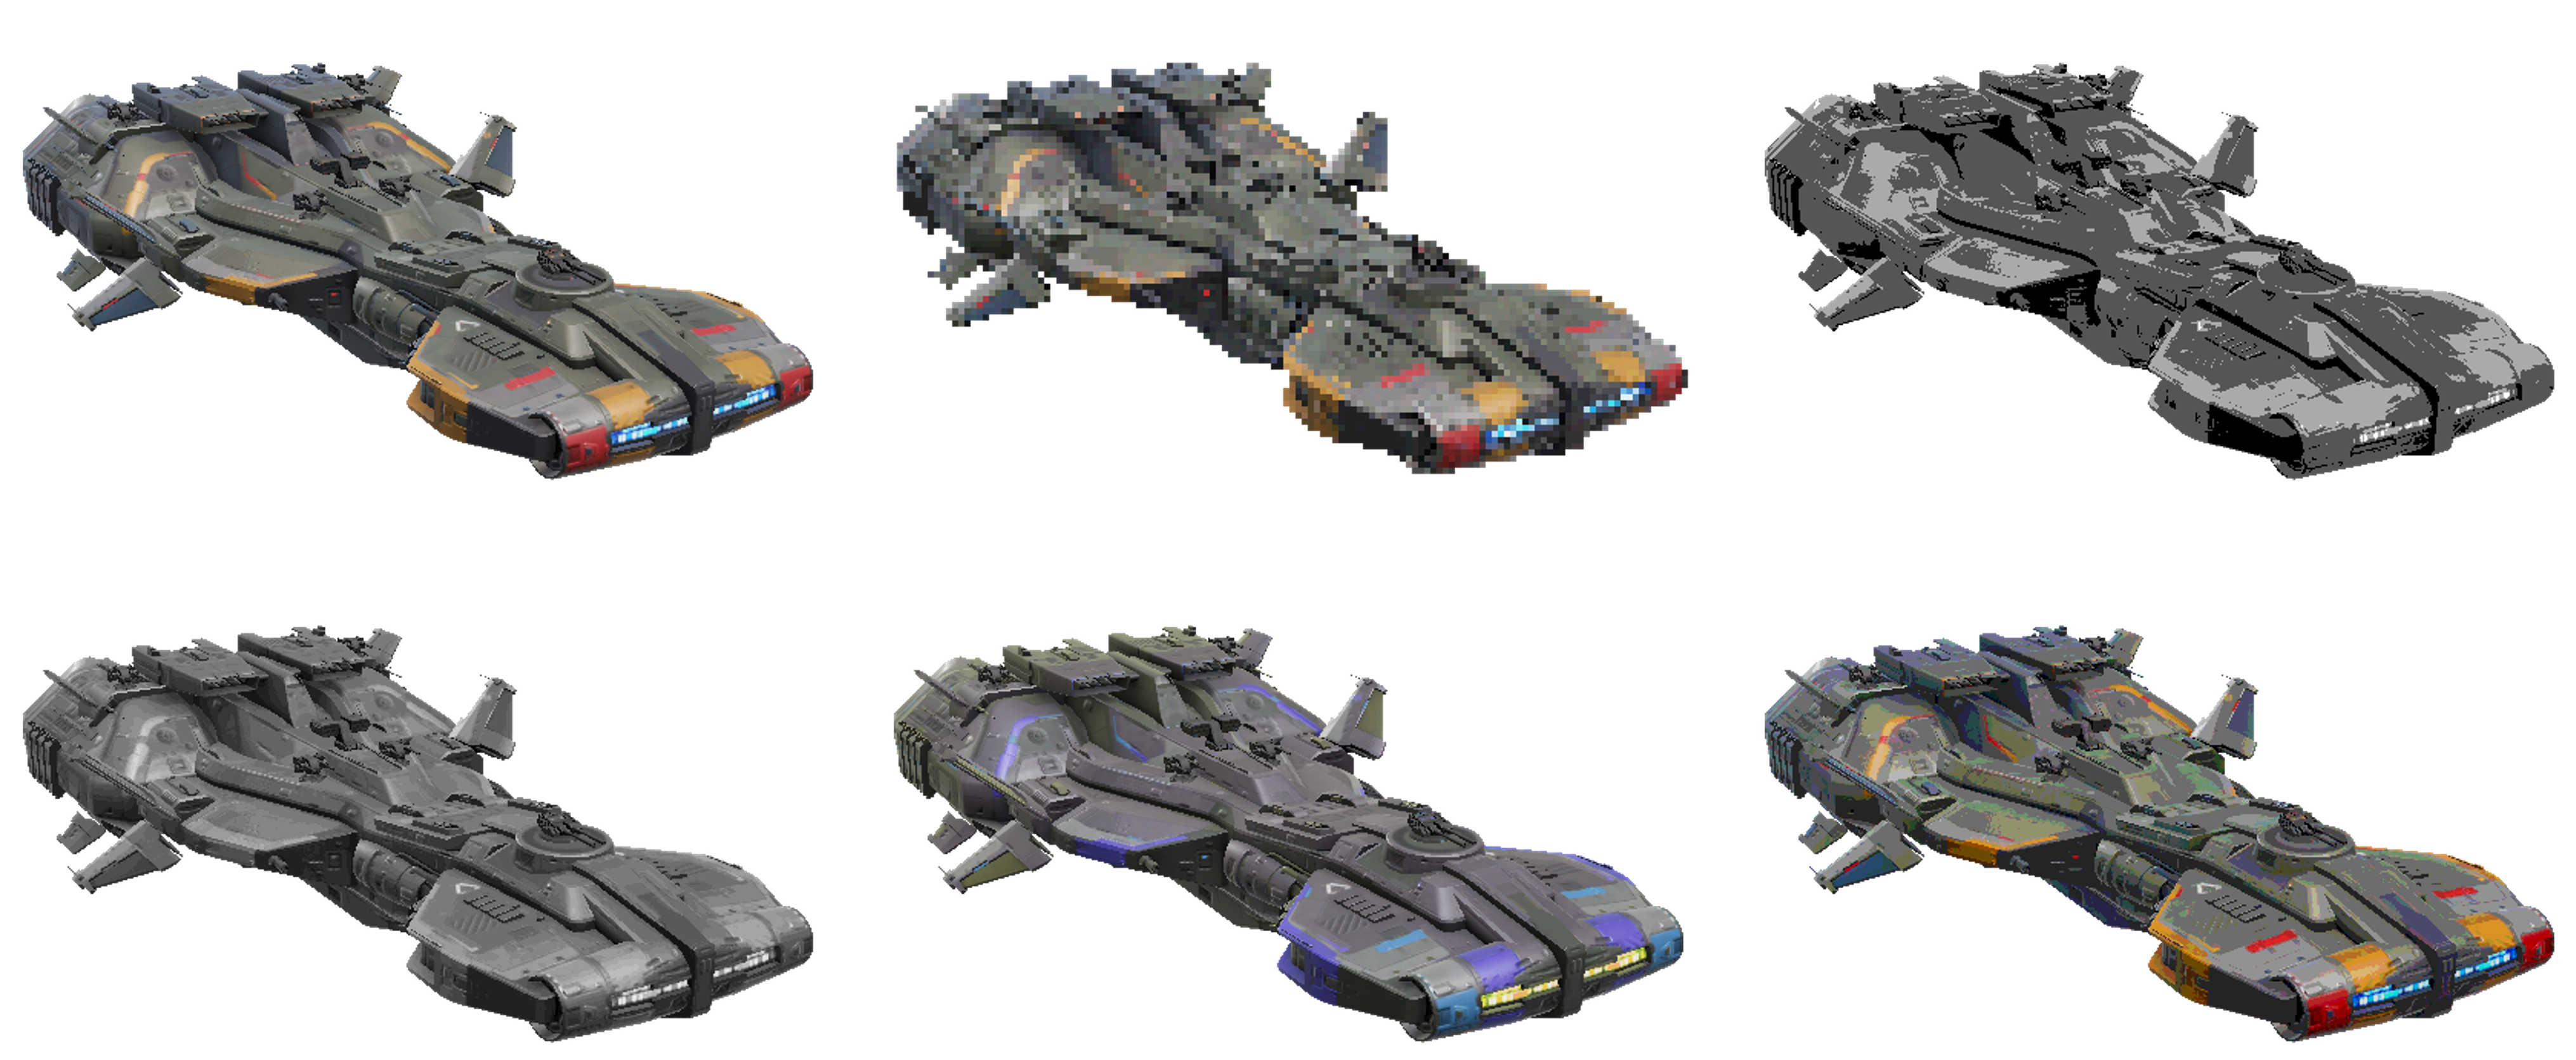
On the Basic tab, the Output Style panel (marked with a blue GLOBAL pill) is a fast image grade that rides the preview and every export path — static sprites, directional sets, animations, particle and VFX bakes alike. An accent dot appears on the header whenever any effect is active, so a style you left on never silently affects output. Leave everything at default for an untouched render.
Style Looks — one-click curated presets that push a full set of values into the grade; the sliders below then reflect them and stay free to fine-tune:
| Look | What it gives you |
|---|---|
| Retro | Chunky low-fi: pixelated with a touch of colour banding — the classic sprite-ify look. |
| Noir | High-contrast black & white with graphic banding. |
| Comic | Bold, inked cel look — hard colour bands and punched-up saturation. |
| Handheld | 1-bit-era pocket console: grayscale, heavily posterized and pixelated. |
| Chill | Cool, desaturated tint over a soft pixel grid — a frosty blue cast. |
Below the looks, the individual controls:
- Pixelation — a Pixelate toggle plus a Block Size slider (
2–32) for the chunkiness of the pixel grid. - Colour — Grayscale toggle, Hue Shift (
0–360°), Saturation (0= grayscale,1= unchanged,2= double), and Posterize — a toggle plus a Levels slider (2–32; fewer = chunkier retro banding). - Orientation — Flip Horizontal and Flip Vertical.
- Restore Defaults — one click back to a neutral, untouched render.
Posterize + smooth backgrounds
Posterize bands the whole frame, so over a gradient, radial or vignette background it collapses the smooth falloff into visible rings. For a clean subject, pair it with a Transparent or Solid background — the panel flags this pairing inline when it applies.
Output Style is pipeline-agnostic
This grade is Snap's own, applied to the captured image — it works the same on Built-in, URP, and HDRP. It's the quickest way to restyle output without touching a render pipeline volume.
2. Global Volume — the full native post stack
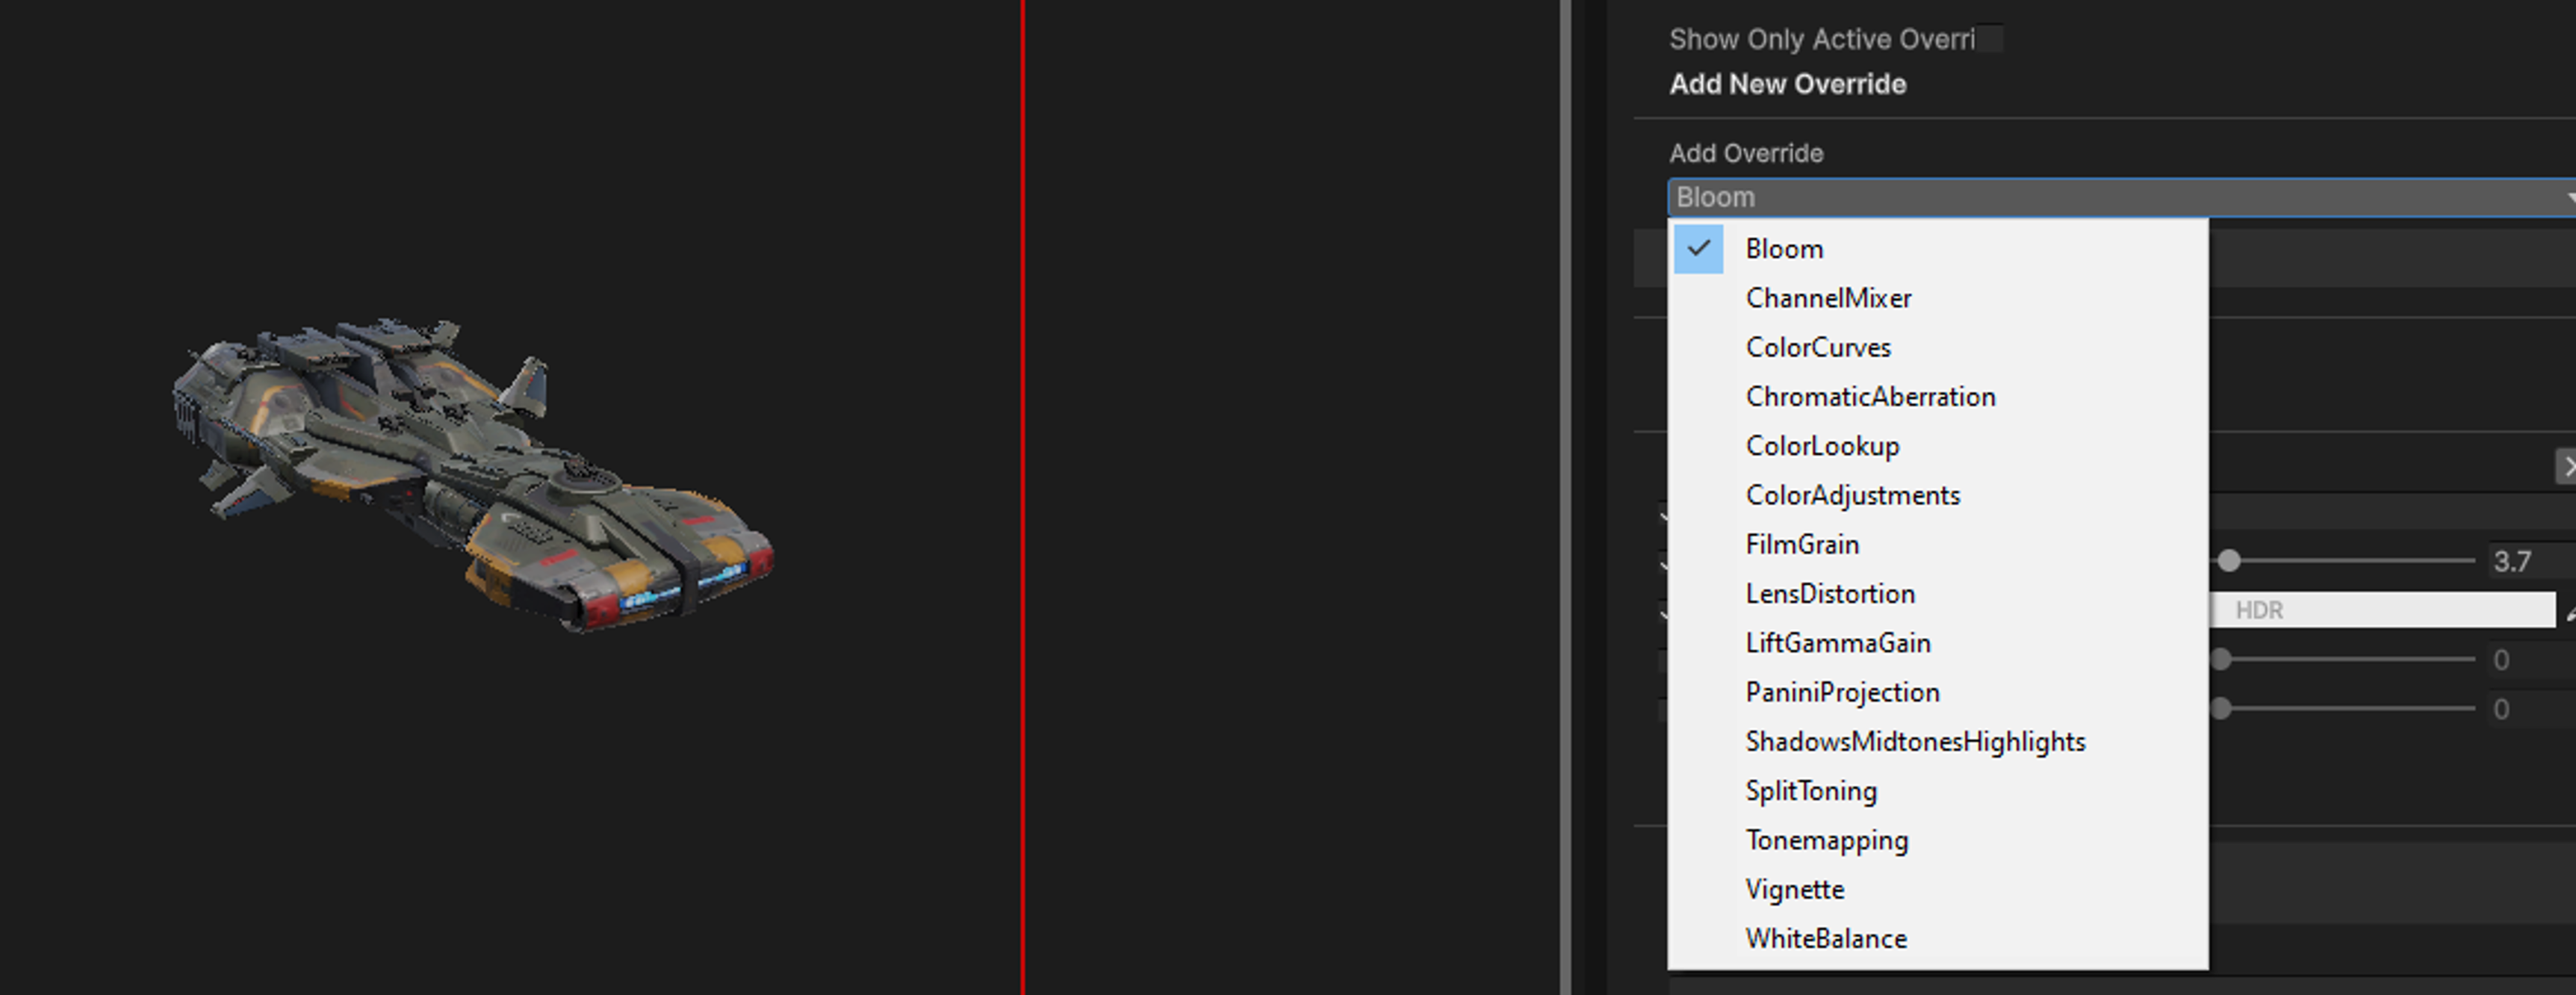
For real cinematic post, the Advanced tab's Global Volume Controls panel edits a render-pipeline Volume Profile directly — the same Bloom, Vignette, Color Adjustments, Tonemapping and friends you'd use in a scene, but scoped to Snap's capture.
- Add Override — pick a post-processing effect from the dropdown to add it to the profile (on HDRP this reads Add Effect). Each added override shows its native inspector, so you edit its properties exactly as you would in Unity.
- Show Only Active Overrides — hide everything you haven't enabled, to keep the list focused.
- Remove any override with the ✕ next to it.
- Volume Presets — save a profile you like and reload it later (stored under
Assets/RevGaming/SnapStudioPro/Presets/…Volumes/). - Reset Volume Profile — back to the default (a Color Adjustments override with Post Exposure = 1).
This layer is pipeline-native
The Volume panel is the active pipeline's system: URP and HDRP each edit their own Volume Profile, and Built-in uses its post-processing stack. The available effects and some labels differ per pipeline, and a few have caveats (bloom, HDRP's fixed exposure) — see Render Pipeline Notes.
3. Studio Presets — the one-click bundle
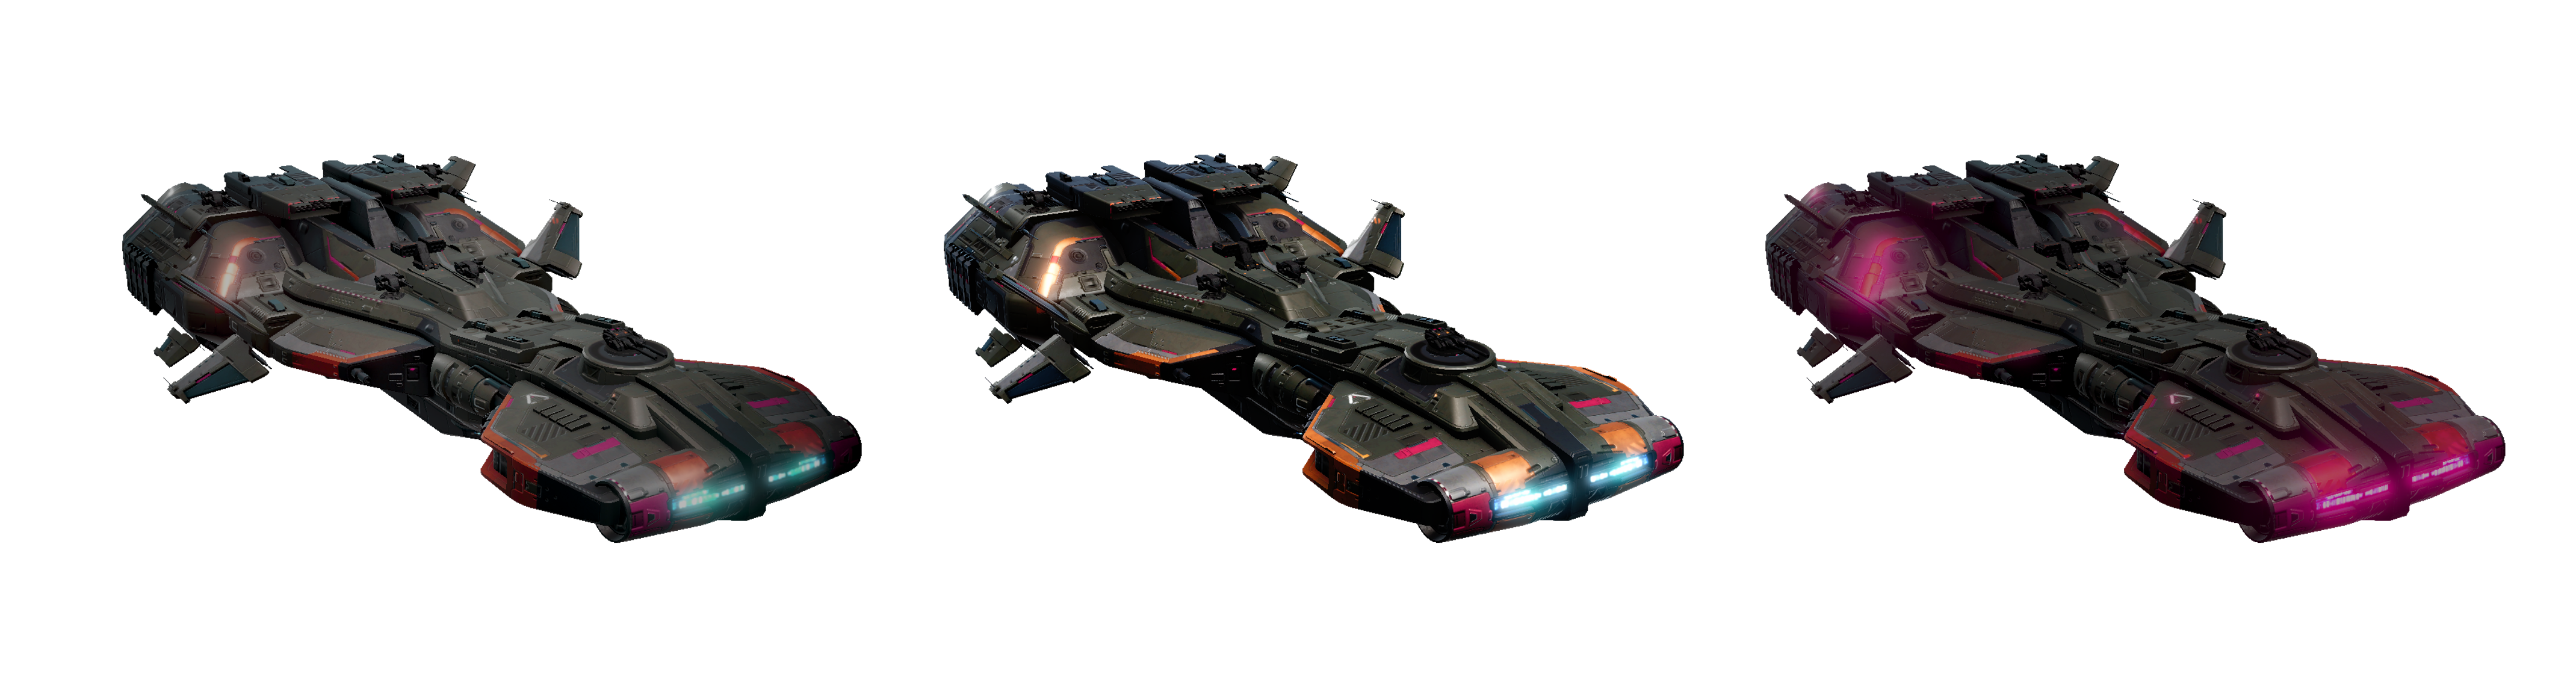
If you don't want to build a look by hand, the Studio Presets (Look & Feel Profiles) bundle a background, a lighting setup, and post-processing into a single choice — Neutral Professional, Stylized Punchy, Cinematic Moody, and so on. They're the fastest path to a finished render, and a good starting point you can then fine-tune with the two layers above. See Lighting & Studio Presets.
Which layer, when
- Just want it to look good, fast? A Studio Preset.
- Want a quick recolour / stylise over everything? Output Style.
- Want bloom, real colour grading, tonemapping, vignette? Global Volume.
- Building a repeatable house look? Grade it once with the layers above, then save it — an Output Style default plus a Volume Preset, or capture the whole thing as a Studio Preset.
Troubleshooting
Bloom looks wrong, or I got a Bloom warning
Bloom interacts with transparent captures and pipeline settings — Snap surfaces a Bloom Warning when the setup is likely to misbehave. Check Render Pipeline Notes for the specifics.
My post-processing isn't showing at all (Built-in)
Built-in RP needs its post-processing layer present. If Snap reports PostProcessing Layer Not Created, the stack isn't set up for the capture — see Render Pipeline Notes.
Everything looks over/under-exposed on HDRP
HDRP uses a fixed exposure for consistent captures. Adjust exposure through the Volume rather than expecting auto-exposure. See Render Pipeline Notes.
My export looks different from the preview
It shouldn't — both Output Style and the Global Volume apply to the preview and the export alike. The usual culprit is a pipeline alpha/exposure quirk, not post-processing; check Render Pipeline Notes.
Next steps
- Backgrounds, overlays, outlines — the other half of the look: Backgrounds & Styling.
- The lighting that post sits on top of — Lighting & Studio Presets.
- Pipeline-specific post behaviour and warnings — Render Pipeline Notes.