Lighting & Studio Presets
Good lighting is what makes a sprite read as finished rather than rendered. Snap Studio Pro lights every prefab automatically the moment you drop it in — a three-point studio rig you can leave alone or take full control of. This page covers both ends: the one-click Studio Presets that set a coordinated look, and the per-light Studio Lighting controls when you want to shape it by hand.
You don't need any of this for a first result
Snap auto-lights on load, so you can capture without touching a single control here. Reach for this page when the default look isn't what you want — when you need it brighter, moodier, or matched across a whole set. If you haven't captured anything yet, start with Your First Sprite.
The studio rig
Every preview scene is lit by a classic three-light setup:
- Key Light — the main directional light; sets the overall brightness and the direction of the primary shadow.
- Fill Light — a softer light from the opposite side that lifts the shadows so the model doesn't go black on its dark side.
- Rim Light — a back/edge light that separates the subject from the background with a bright outline.
These three are what the studio presets tune, and what the Advanced tab lets you edit individually. Snap labels them Key Light, Fill Light, and Rim Light wherever they appear.
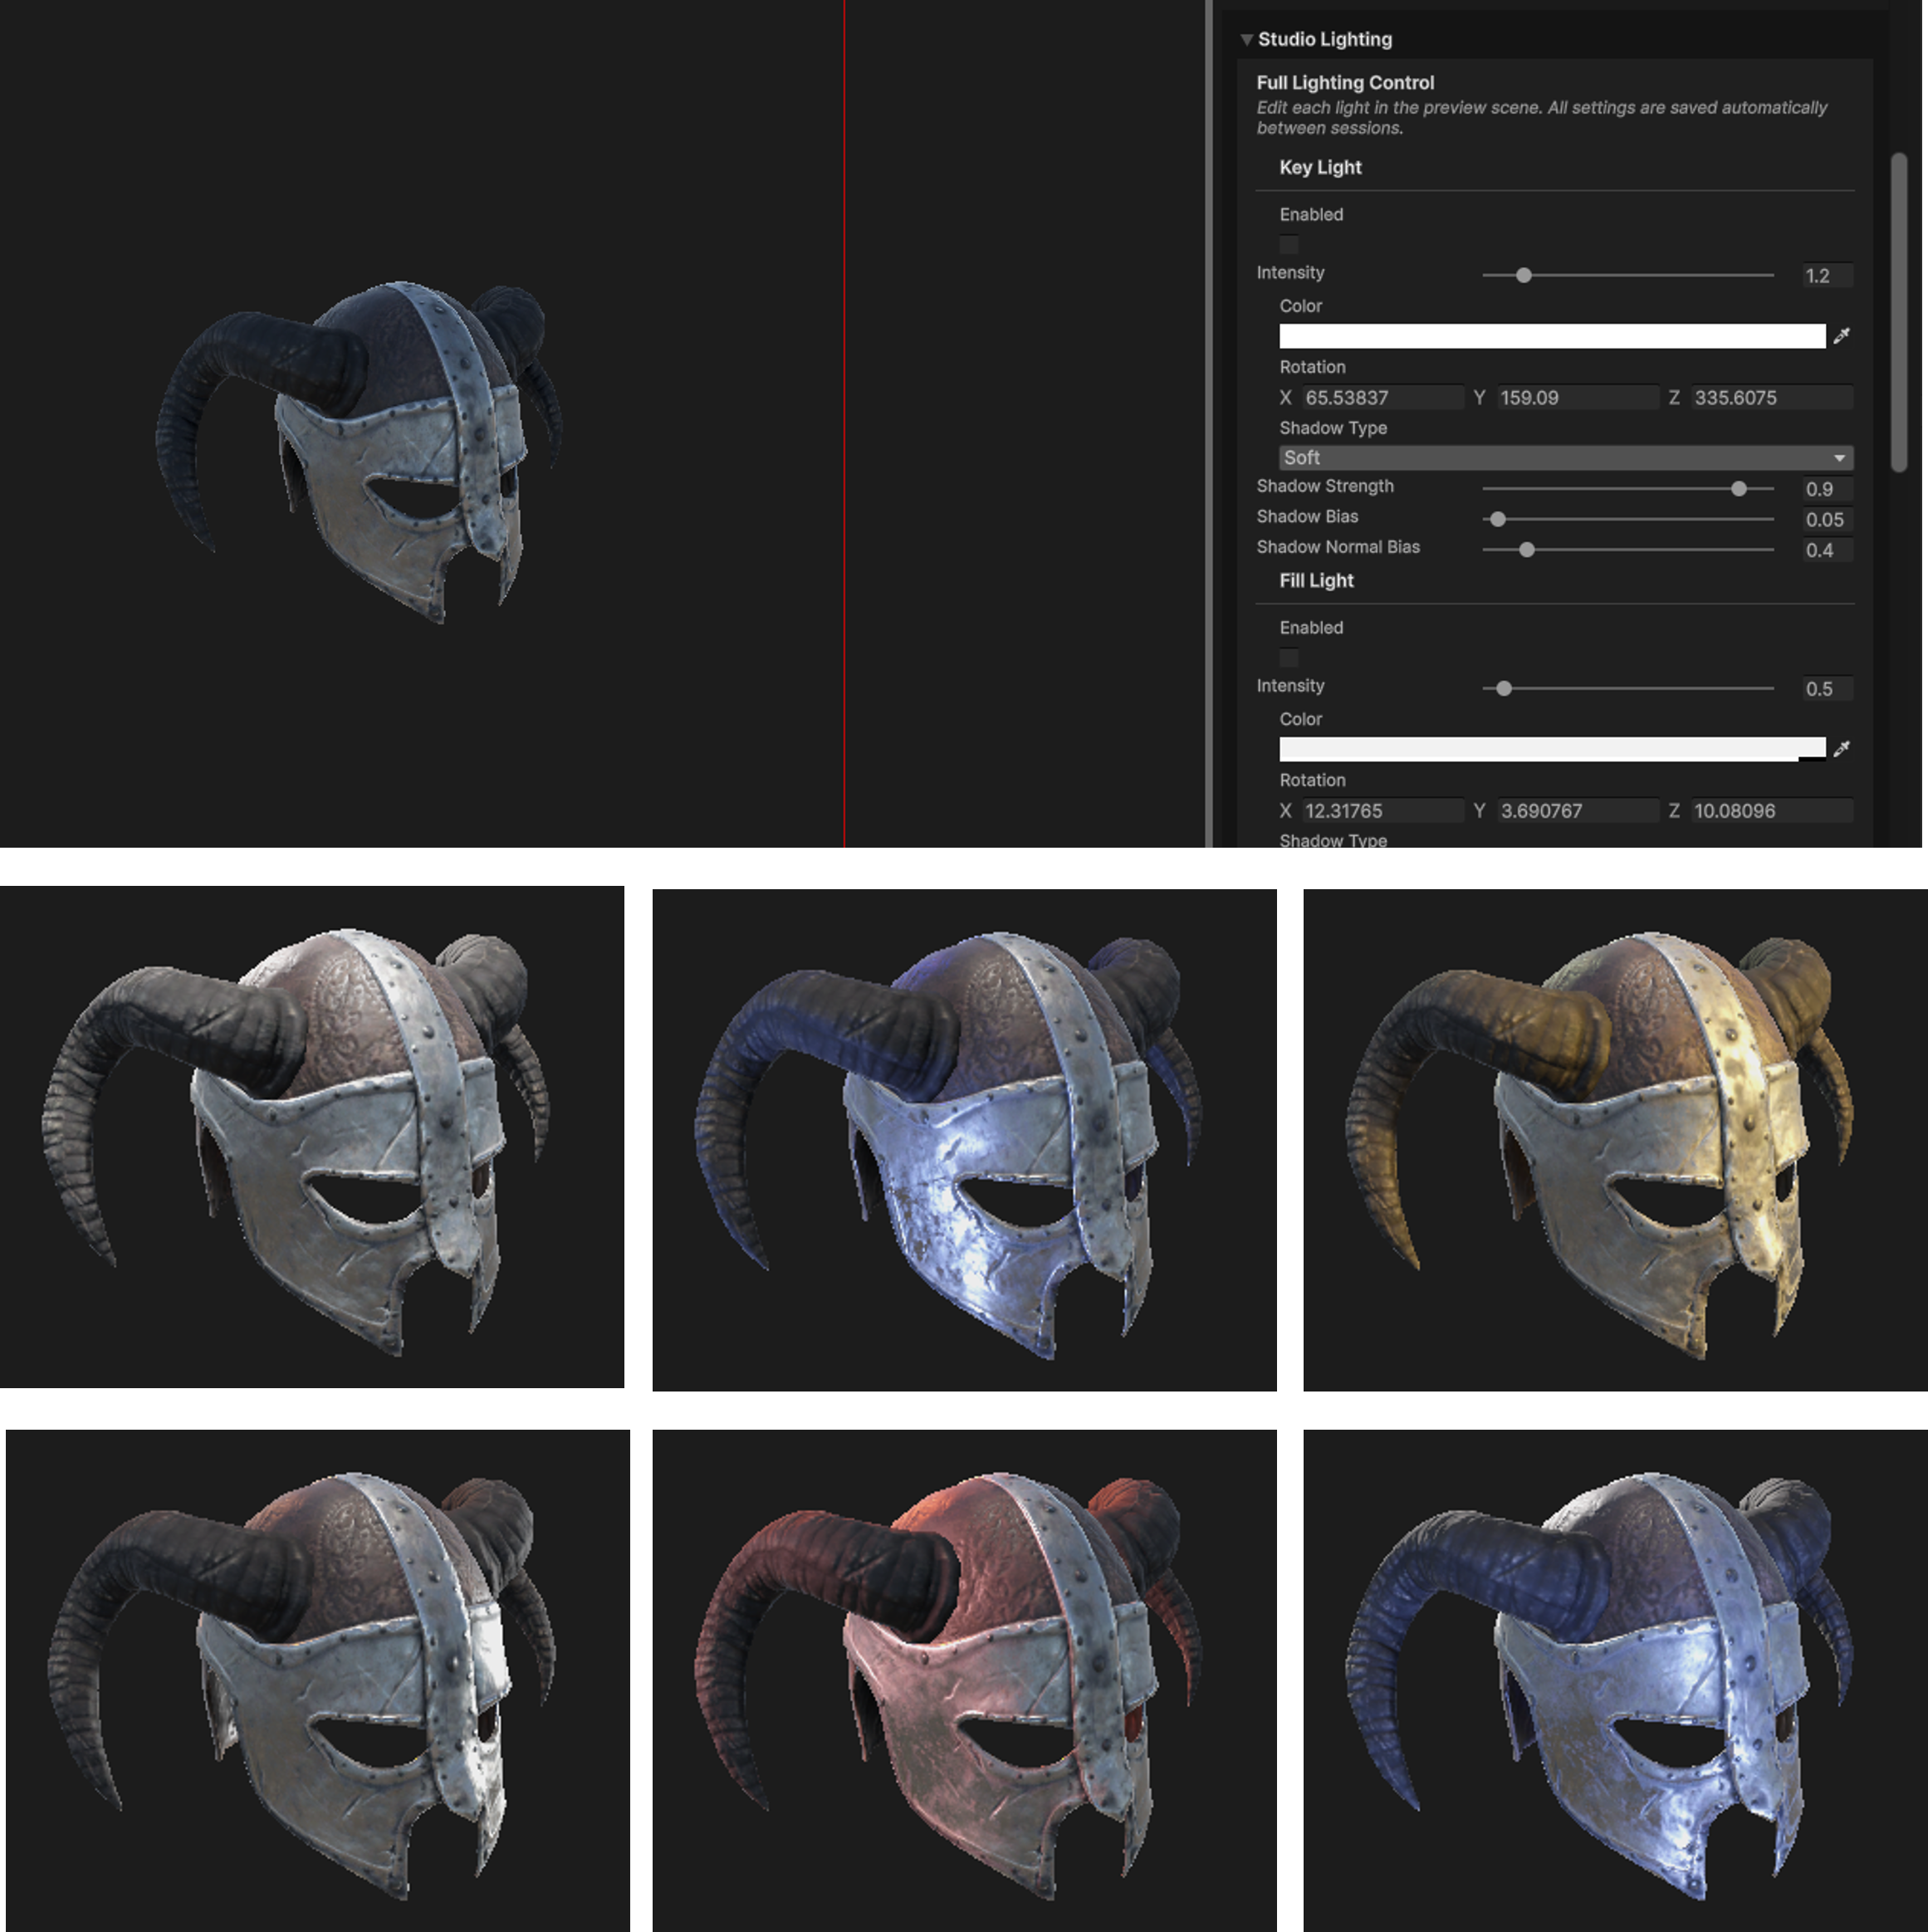
Studio Presets — one-click looks
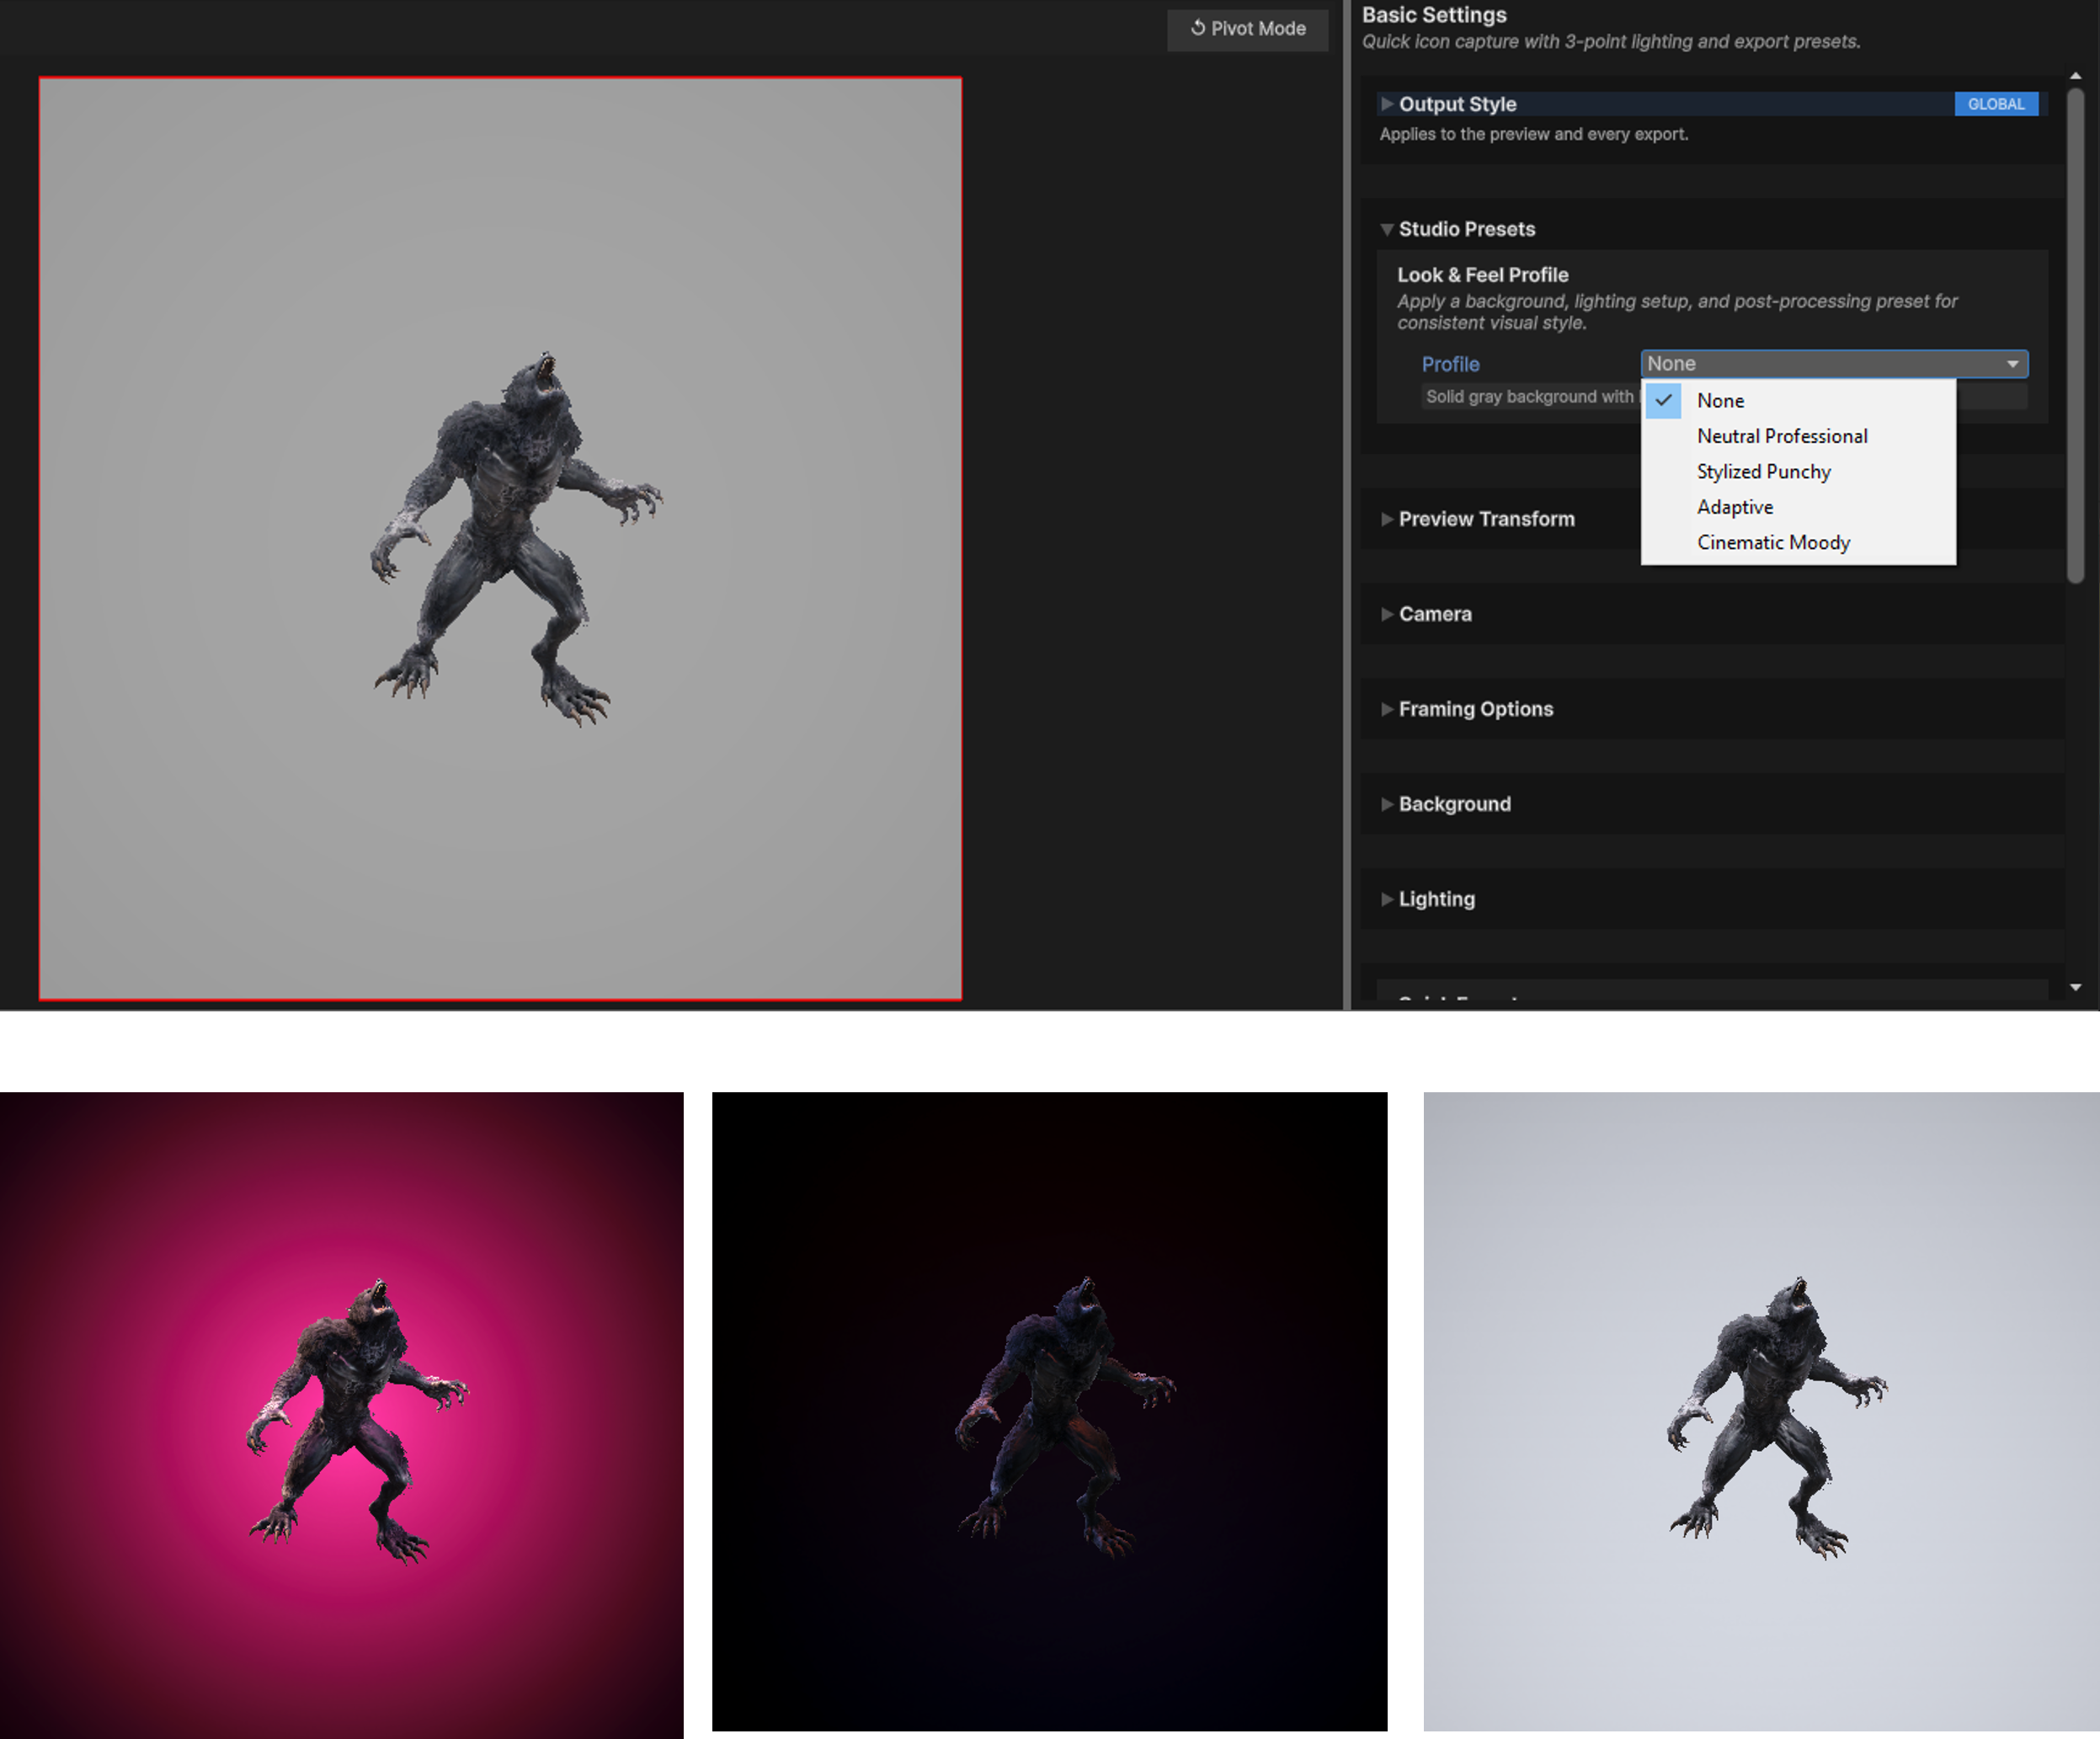
On the Basic tab, open the Studio Presets section and pick a Profile. A profile is a coordinated look: it sets the background, the three-point lighting rig, and (where the pipeline supports it) post-processing together, so the whole image changes as one considered choice rather than a pile of sliders.
| Profile | What it does |
|---|---|
| None | Solid gray background with basic lighting and no post-processing. |
| Neutral Professional | Soft gradient background, neutral 3-point lighting, and subtle post-processing for clarity. |
| Stylized Punchy | Vibrant radial background, bold high-contrast lighting, and dramatic post-effects for impact. |
| Adaptive | Background and lighting adapt to the prefab's colour, with subtle post-processing adjustments. |
| Cinematic Moody | Dark gradient background, cool-to-warm lighting contrast, and strong vignette with grain. |
The panel shows a short description of the selected profile underneath the dropdown. Picking one applies it to the live preview immediately.
Adaptive reads your prefab
The Adaptive profile samples the average material colour of the loaded prefab and tunes the background tint, post-processing, and rig brightness to suit it — darker models get a brighter rig so they still read clearly. It's a good default when you're capturing a varied set and don't want to hand-tune each one.
Studio Presets need a scriptable render pipeline
The coordinated post-processing and the profile lighting rigs are built for URP and HDRP. On the Built-in pipeline the Studio Presets section isn't shown — you light the scene with the manual controls below instead. See Render Pipelines for what differs per pipeline.
Basic lighting controls
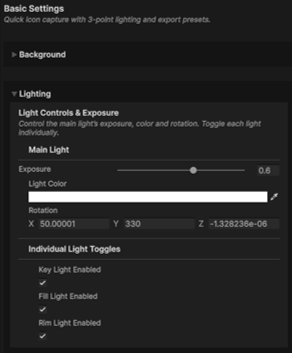
Still on the Basic tab, the Lighting section gives you a light, pipeline-agnostic surface aimed at the key light:
- Exposure — a normalised
0–1brightness slider for the main (key) light. Snap maps this into whatever intensity range the active pipeline expects, so the slider behaves consistently across Built-in, URP, and HDRP. - Light Color — the colour of the main light.
- Rotation — the direction the main light points, as Euler angles.
- Individual Light Toggles — an Enabled checkbox per light in the rig, so you can, say, kill the rim light for a flatter look.
This is the right level of control for most single captures. When you want to sculpt each light, move to the Advanced tab.
Full control — Studio Lighting (Advanced tab)
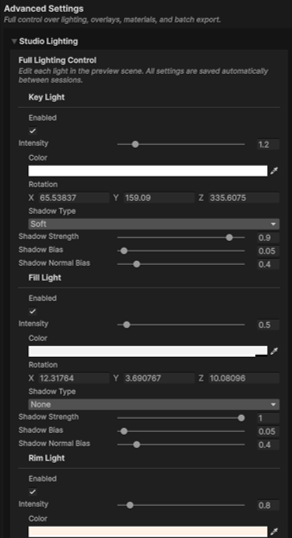
The Advanced tab's Studio Lighting section edits every light in the preview scene independently. For each of the Key, Fill, and Rim lights you get:
- Enabled — turn the light on or off.
- Intensity — a slider clamped to the active pipeline's valid range. On HDRP the label reads Intensity (Lux), reflecting the physical units HDRP uses.
- Color — the light's colour.
- Rotation — the light's direction.
- Shadow Type —
None,Hard, orSoftshadows. - Shadow Strength, Shadow Bias, and Shadow Normal Bias — fine control over how the cast shadow looks and how it avoids self-shadowing artefacts.
Every edit here is saved automatically between sessions, and each is undoable.
Only one light casts shadows at a time
When you turn on shadows for one light, Snap disables shadow casting on the others and tells you so. This is deliberate — layered shadows from multiple directional lights muddy a sprite and make icons harder to read. Pick the one light whose shadow you want.
Saving your own looks
The Studio Lighting section has a Presets block. Type a name and save the current rig — all three lights, their intensities, colours, rotations, and shadow settings — as a reusable lighting preset. Presets are stored as .json files under the project, so you can build up a library of looks and re-apply them across prefabs and sessions.
The same block lets you:
- Load a saved preset back onto the current rig.
- Reset to defaults — return the rig to Snap's built-in starting point.
Presets vs. Studio Presets
Two different things, deliberately:
- Studio Presets (Basic tab) = a whole-image look — background + lighting + post-processing — chosen from a curated list.
- Presets inside Studio Lighting (Advanced tab) = just the lighting rig, including your own saved ones.
Use Studio Presets to set a look fast; use lighting Presets to bank and reuse a rig you've dialled in by hand.
Render-pipeline-aware behaviour
Snap keeps lighting consistent across pipelines by adapting under the hood rather than exposing three different UIs:
- The Exposure slider is always normalised
0–1; Snap converts it to the pipeline's real intensity range. - Intensity sliders are clamped to what the active pipeline accepts, so a restored preset never lands on an invalid value.
- On HDRP, intensities are physical (Lux) and the label says so.
- URP and HDRP unlock the coordinated Studio Presets (background + lighting + post-processing); Built-in relies on the manual controls.
If your intensities or the available controls look different from a colleague's, it's almost always the render pipeline. See Render Pipelines for the full breakdown.
Troubleshooting
My model looks flat / has no depth
You're likely running key-only. Check that the Fill and Rim lights are enabled (Basic tab → Lighting → Individual Light Toggles, or Advanced tab → Studio Lighting), and give the rim a little more intensity to separate the subject from the background.
My shadows disappeared when I enabled another light's shadows
That's the single-shadow rule — only one light casts shadows at a time. Enabling shadows on one light disables them on the others. Choose the one whose shadow you want to keep.
The Studio Presets section isn't there
You're on the Built-in render pipeline, where coordinated presets aren't available. Light the scene with the Basic and Advanced controls, or switch to URP/HDRP — see Render Pipelines.
My exposure slider does nothing on this pipeline
If the active pipeline exposes no main/key light, Snap tells you so in the Lighting section. Use the per-light controls on the Advanced tab's Studio Lighting section instead.
Next steps
- Want the light's shadow on the ground, as a separate pass? The Shadows tab sets up a shadow catcher — lighting direction, softness, and opacity are still driven from here. See the Window Tour for where it lives.
- Setting the backdrop, not the light? Backgrounds & Styling covers background modes, overlays, and stylised looks.
- Framing the shot? Framing & Camera covers the camera fit and angle.
- Capturing a whole set to one look? Save a lighting preset (or pick a Studio Preset), then head to Batch Exporting.