Environment Extraction
Characters and props are the obvious use for a sprite exporter — but a lot of a 2D game is scenery: buildings, trees, rocks, walls, crates, terrain pieces. The Environment tab is built for exactly that. It takes static 3D props and scenery and turns them into clean 2D sprites, framed top-down or isometric by default, and sized so they drop into a scene at a believable world scale.
Prerequisites
Environment prefabs in your project — static meshes like buildings, foliage, rocks, or props. Load them into Snap's prefab browser so they appear in the grid, the same way you load any prefab.
What it's for
The Basic and Advanced tabs frame a subject like a character — centred, often at a three-quarter hero angle. Scenery wants something different: a consistent top-down or isometric framing, and a true-to-life world scale so a tree sprite and a rock sprite sit correctly next to each other in the same scene.
The Environment tab defaults to that: an orthographic, top-down framing (pitched straight down), tuned for tiles, props, and isometric scenery rather than showcase hero shots.
Loading a prefab
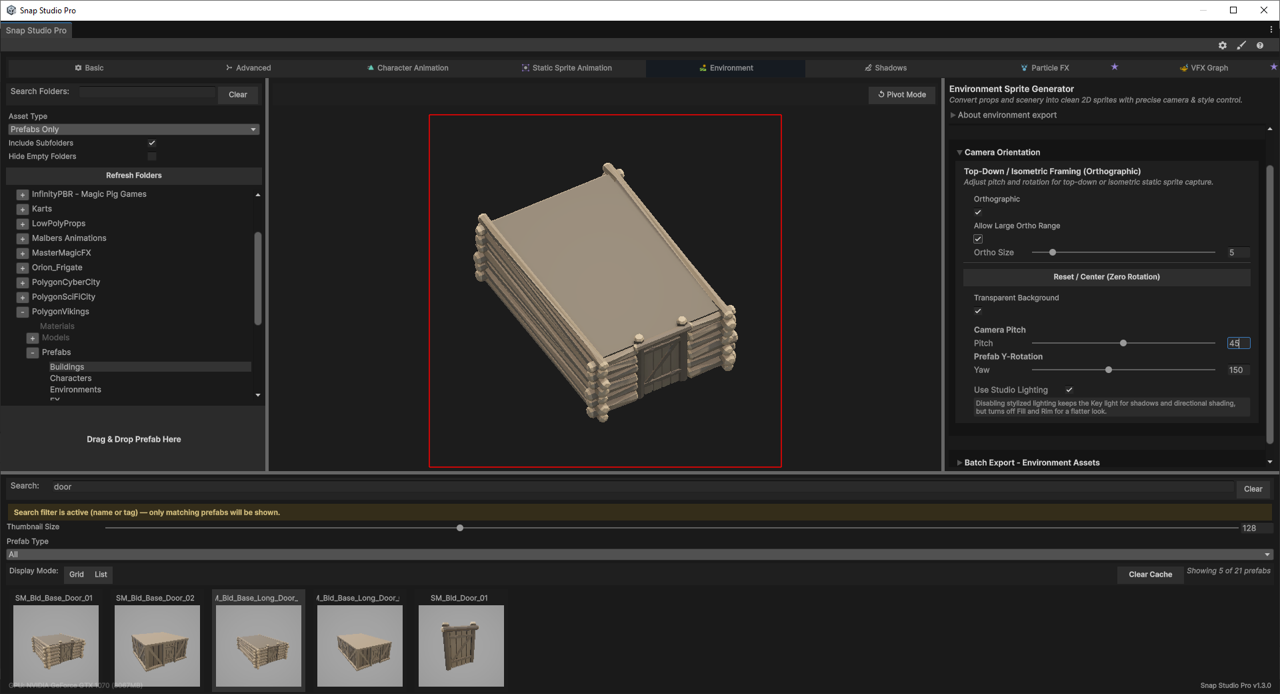
Open the Environment tab and load an environment prefab the same way you load any prefab — drop one onto the drag-and-drop zone, or pick it from the prefab browser grid. It appears in the live preview, framed by the environment camera.
Framing scenery
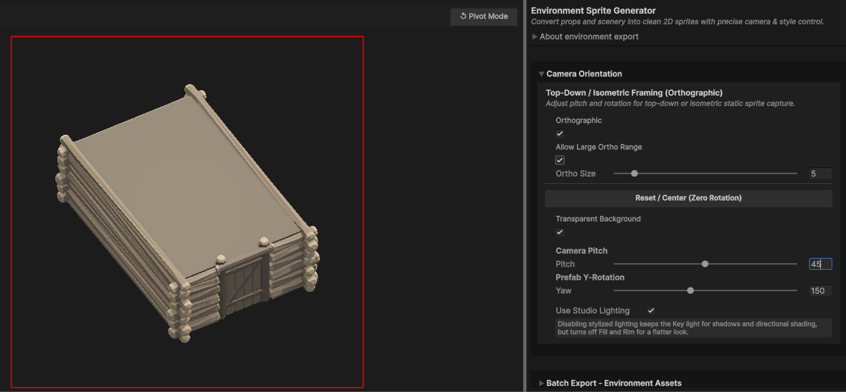
The environment camera panel — Top-Down / Isometric Framing (Orthographic) — gives you the controls that matter for scenery:
- Pitch and rotation for top-down or isometric angles.
- Orthographic projection by default, so parallel lines stay parallel and sprites don't foreshorten — the right choice for consistent tile and prop sizing. The orthographic size is computed automatically but you can tweak it by hand.
Perspective mode is for showcase shots, not tiles
You can switch to perspective for a stylised or showcase export, and Snap lets you — but for consistent sizing, tilemap workflows, and sprite-sheet generation, orthographic is recommended. Snap shows this note when you leave orthographic mode.
Extracting a static sprite
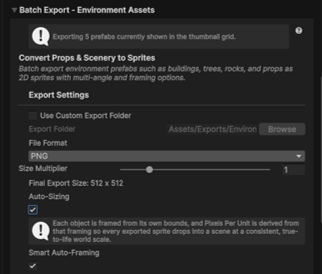
Environment capture is static — a single clean frame per prefab, not an animation. The output sizing is where it earns its keep:
- Auto-Sizing (on by default) frames each object from its own bounds and derives the Pixels Per Unit from that framing, so every exported sprite drops into a scene at a consistent, true-to-life world scale. When Snap imports the result, it applies that PPU automatically — so the sprite lands at the intended size, not Unity's project-default.
- Manual Pixels Per Unit is there when you want a fixed PPU instead, with quick presets (
32,64,100,128). - Smart Auto-Framing adjusts the camera to fit tall, wide, or square prefabs cleanly.
Auto-Sizing needs a scriptable render pipeline
Auto-Sizing isn't supported on Unity's Built-in Render Pipeline — the toggle is disabled there and Snap tells you to use manual Pixels Per Unit instead. On URP or HDRP it works as described. See Render Pipelines.
Batch environment capture
Because a scene needs many props, the Environment tab's export is batch-first. The Batch Export – Environment Assets panel captures every prefab currently shown in the grid — filter it down first, and the panel shows a live count of what will export.
- Capture Multiple Angles exports each prefab at several yaws — auto-distributed evenly around 360°, or set by hand — for turnarounds or angled scenery variants.
- Subfolder per Prefab groups each prefab's output into its own folder.
- Like all Snap batch runs, it captures one prefab at a time off the Editor's update tick, so the Editor stays responsive and you can Stop Export cleanly mid-run.
Frame for your largest prefab first
Frame the preview for your largest prefab before exporting a batch. With Smart Auto-Framing on, that ensures every capture fits cleanly. Snap surfaces this tip right above the export button.
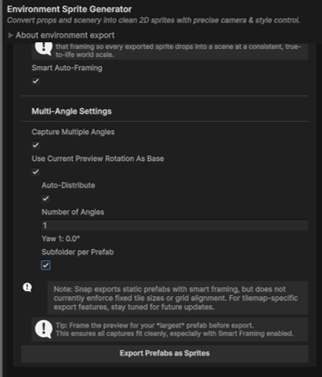
Click Export Prefabs as Sprites and the whole filtered set is captured, imported under Assets/ as Unity Sprites at the world scale you configured.
Troubleshooting
My sprites are the wrong size in the scene
That's Pixels Per Unit. Leave Auto-Sizing on for automatic world-scale sizing, or set a deliberate Pixels Per Unit manually so every asset shares the same scale.
Auto-Sizing is greyed out
You're on the Built-in Render Pipeline, where it isn't supported. Switch to manual Pixels Per Unit, or move to URP/HDRP — see Render Pipelines.
My scenery looks distorted or foreshortened
You're likely in perspective mode. Switch the camera back to orthographic for consistent, undistorted scenery sizing.
Some prefabs are cut off in a batch
Frame the preview for your largest prefab before running, and keep Smart Auto-Framing on so each prefab is framed from its own bounds.
Next steps
- Capturing a lot of assets at once? Batch Exporting covers batch runs, progress, and output organisation across the whole tool.
- Want one prop with more control? Capturing a Single Sprite is the general single-capture workflow.
- Fine-tuning the look? Framing & Camera and Lighting & Studio Presets apply here too.