Backgrounds & Styling
The background is the single most common reason a sprite doesn't come out the way people expect — usually "my PNG has a solid background when I wanted it transparent." This page fixes that, then goes further: gradients and other backdrops, watermark overlays, one-click stylised looks, and post-processing where the pipeline supports it.
Just want a transparent sprite?
Set the background to Transparent and export a PNG. That's the whole answer for most sprite work — the rest of this page is for when you want a backdrop, a watermark, or a stylised look. New here? Start with Your First Sprite.
Background modes
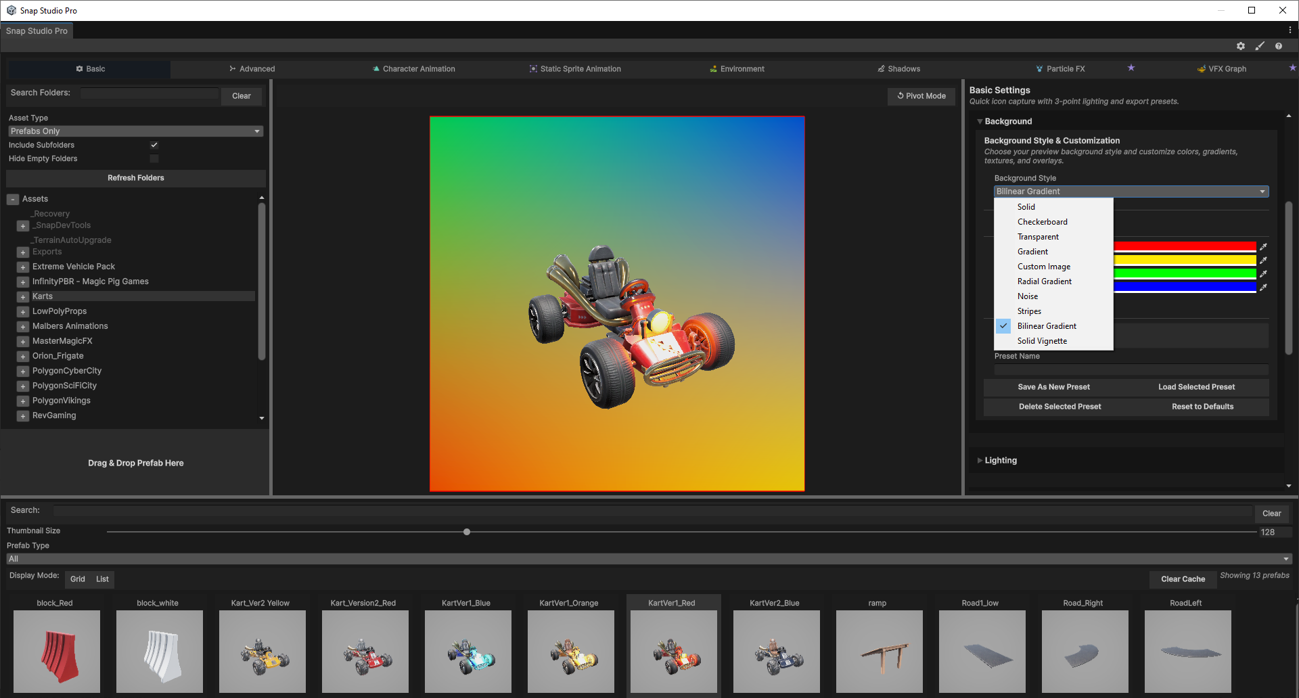
On the Basic tab, open the Background section and pick a Background Style. The style you choose is baked into the capture — what you see in the preview is what lands in the file. Snap ships with Transparent as the default, so a fresh install exports sprites on empty alpha out of the box. Snap ships these styles:
| Style | What it is |
|---|---|
| Transparent | No background — the exported alpha is empty around your subject. This is the one you want for sprites, and it's the default. The preview shows a light/dark checkerboard so the alpha canvas stays visible; the checker is a preview aid only and is never baked into the export. |
| Solid | A single flat Solid Color. |
| Gradient | A vertical gradient between Gradient Top Color and Gradient Bottom Color. |
| Radial Gradient | A Center Color to Edge Color falloff, with a Radial Falloff slider. |
| Bilinear Gradient | Four-corner blend (Top-Left, Top-Right, Bottom-Left, Bottom-Right). |
| Checkerboard (Rendered) | Two-colour checker baked into the export (Checker Size, Checker Color 1/2). Distinct from the preview-only transparency checker — this one lands in the file. |
| Stripes | Horizontal bands (Stripes Color 1/2, Stripe Height). |
| Noise | Procedural noise between two colours (Noise Color 1/2, Noise Scale). |
| Solid Vignette | A Base Color darkened toward the edges by a Vignette Darkness slider. |
| Custom Image | Your own texture as the backdrop (Background Texture). |
Each style reveals just its own settings underneath the dropdown, and every change updates the live preview and is saved automatically.
Transparency and your exported alpha
This is the important one. A solid, gradient, or any other opaque background gets baked into the capture — so if your PNG has a colour behind the subject, the background style is the cause. For a transparent sprite, set Background Style to Transparent.
Preview checkerboard toggle
On the Transparent style, Snap shows a Preview checkerboard toggle. On (the default), the preview paints a checkerboard behind transparent areas so the alpha canvas is easy to see. Turn it off for a plain backdrop — clearer when you're judging shadow work against a shadow catcher, where a checker fights the shadow. Either way it's preview-only and never touches the export.
URP/HDRP: transparency needs Alpha Support enabled
Setting the style to Transparent isn't always enough on a scriptable render pipeline. Snap shows this reminder on the Transparent style:
To truly export with alpha, you must enable 'Alpha Support' in your Render Pipeline Asset settings.
If your background comes out solid black or opaque even on Transparent, that setting is almost certainly off. The full walkthrough is in Render Pipelines. Snap also warns you at capture time when the pipeline is about to strip the alpha, so you're not left guessing.
Custom Image textures must be readable
If you pick a Custom Image background and the texture isn't marked Read/Write, Snap rejects it and tells you to enable Read/Write in the texture's import settings, then reselect it.
Background presets
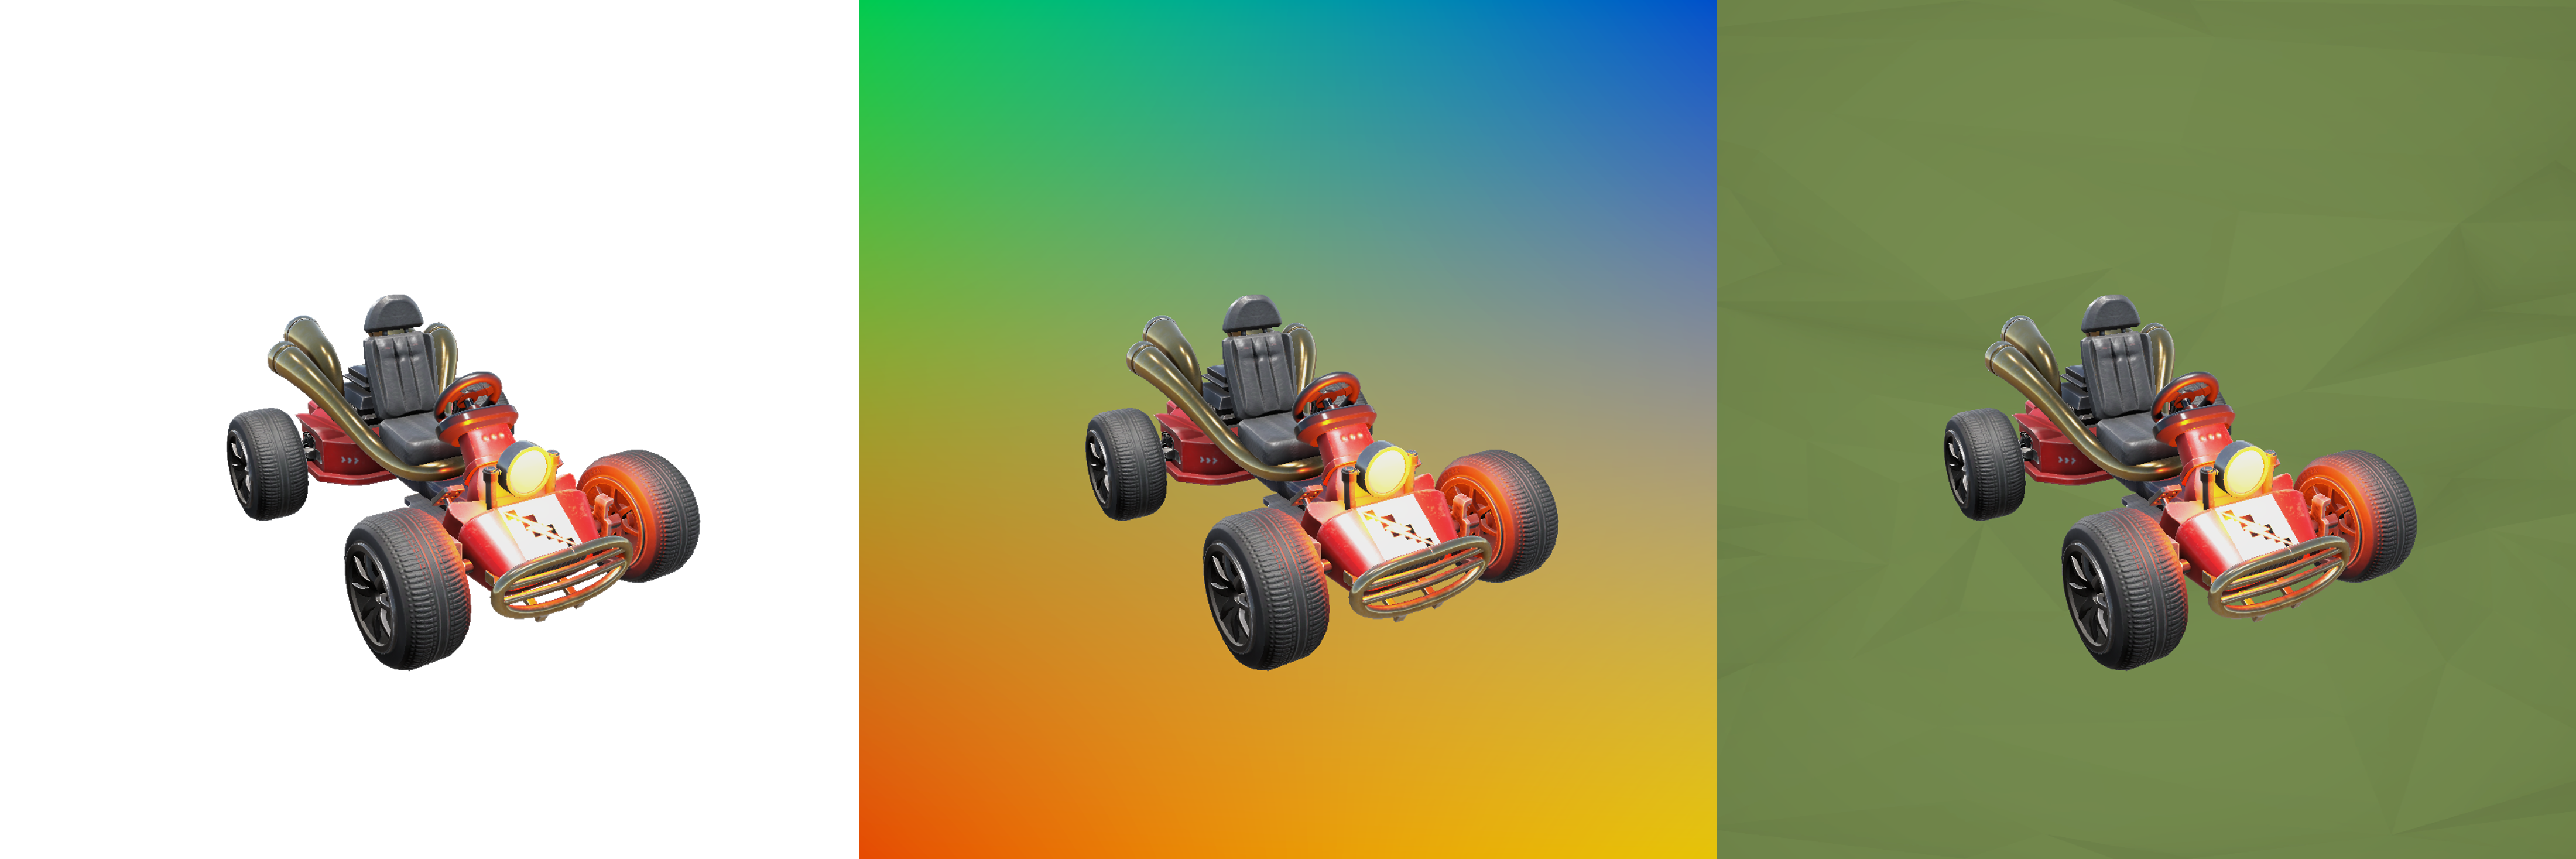
The Background section has its own Presets block — save the current background style and all its colours under a name, load it back later, or Reset to defaults. Handy when you've dialled in a branded backdrop you want to reuse across prefabs.
Output Style and post-processing
Beyond the background, Snap has a global Output Style grade (one-click Style Looks plus colour, pixelation, and flip controls that ride every export) and a full native post-processing stack (bloom, vignette, colour grading, and more via the pipeline's Volume). Those are a workflow of their own:
Overlays — watermark text and logos
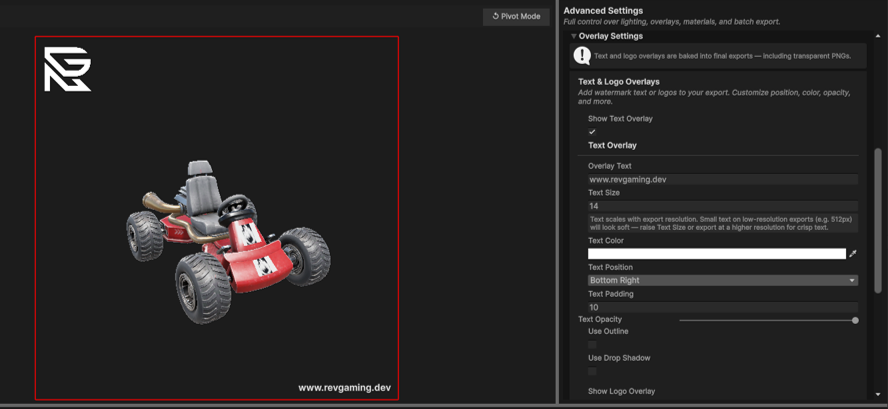
The Overlay Settings section (Advanced tab) stamps text and/or a logo onto the final image. Overlays are baked into exports — including transparent PNGs — so they're ideal for watermarks and attribution.
Text overlay — toggle Show Text Overlay, then set:
- Overlay Text, Text Size, Text Color, Text Position (nine anchor points), Text Padding, and Text Opacity.
- Optional Use Outline (with colour) and Use Drop Shadow (with colour and offset) for legibility over busy backgrounds.
Logo overlay — toggle Show Logo Overlay, assign a Logo Texture, then set Logo Scale, Logo Position, Logo Padding, and Logo Opacity, with matching optional outline and drop shadow.
Text scales with export resolution
Overlay text scales to the export size, so small text on a low-resolution capture (e.g. 512 px) will look soft. Raise Text Size or export at a higher resolution for crisp text — Snap notes this right in the panel.
Shadows
Backgrounds decide what's behind your subject; shadows decide what's beneath it. Snap has a dedicated Shadows tab — a shadow catcher that grounds your subject with a contact shadow, which you can bake into the sprite or export on its own. It's a workflow of its own, so it has its own page:
→ Shadows
Troubleshooting
My PNG has a solid background / no transparency
Set Background Style to Transparent. If it's still opaque on URP or HDRP, enable Alpha Support in your Render Pipeline Asset — Snap warns you when the pipeline is about to strip the alpha. See Render Pipelines.
A colour filter / pixelation is on everything I export
That's the global Output Style grade — see Post-Processing. Open it and click Restore Defaults to return to a neutral render.
My Custom Image background won't apply
The texture isn't readable. Enable Read/Write in its import settings, then reselect it — Snap keeps the warning visible until you do.
My overlay text looks blurry
It scaled down with the export. Raise Text Size or export at a higher resolution.
Next steps
- Lighting the subject and its shadow? Lighting & Studio Presets covers the three-point rig and per-light shadow controls.
- Want the whole look in one pick? The Studio Presets (Basic tab) set background + lighting + post-processing together — see Lighting & Studio Presets.
- Applying one style to a whole set? Set your background and Output Style, then batch it — Batch Exporting.
- Chasing transparent alpha specifically? Render Pipelines has the definitive per-pipeline alpha guidance.